Start with the part: geometry, access, and distortion risk
A 5-axis vise should be selected around the part first, not the product brochure first. Thin walls, deep pockets, awkward tool approach angles, and unfinished raw stock all change what the right vise looks like. Good selection starts with geometry, access, and how much distortion risk the part can tolerate.
Before comparing brands, define the part envelope, grip zone, raw-stock condition, and the minimum tool clearance you need after the workpiece is seated. That usually eliminates the wrong vise sizes faster than any catalog comparison.
Selection checklist: jaw width, stroke, height, and mounting strategy
- Low profile with enough body stiffness: compact is good, but only if the vise still keeps the workpiece stable under the intended cutting load.
- Stroke that matches the real part family: do not size only for the largest part if it weakens support for the most common parts you run.
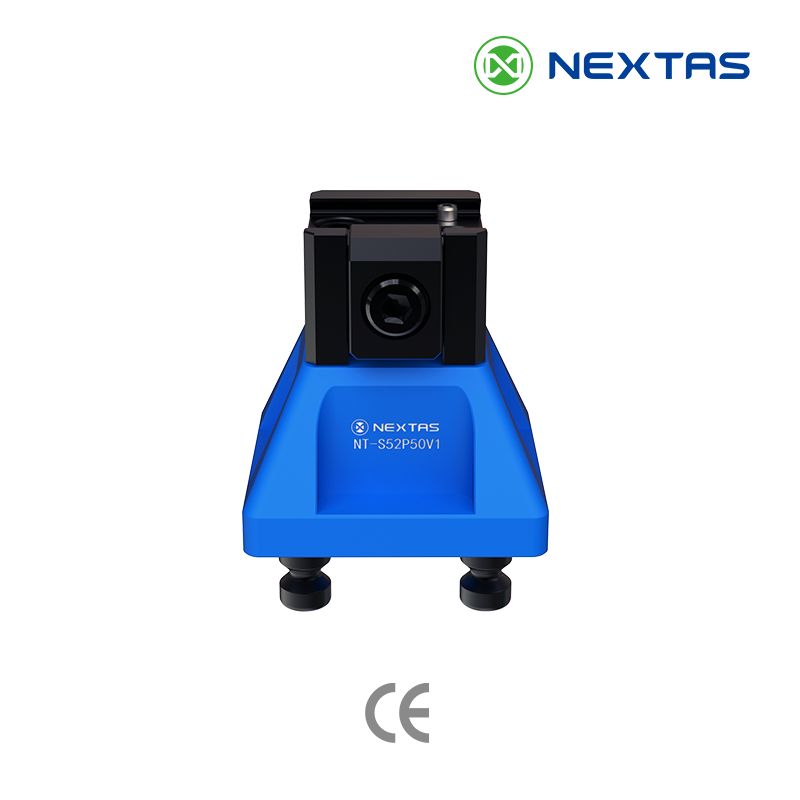
- Mounting strategy: confirm whether the vise sits directly on the table, on risers, or on a zero-point plate because that decides the real Z-height budget.
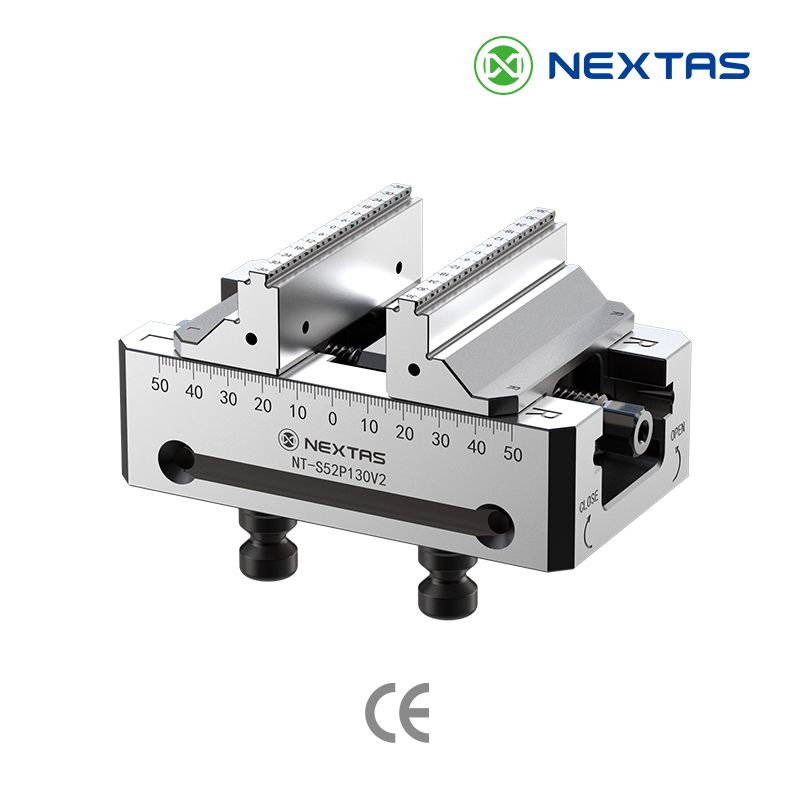
- Repeatable centering: synchronized jaw movement matters most when the job needs predictable datum transfer from one setup to the next.
Choose jaw style and grip depth by part condition
The jaw set often decides whether a 5-axis vise feels precise or frustrating. The same vise body can behave very differently on rough forgings, thin-wall aluminum, or round stock if the contact strategy is wrong.
When to add risers, soft jaws, or dovetail support
Add risers when you need extra tool access around the lower half of the part, but only after checking whether the extra height hurts rigidity. Use soft jaws when the part surface or wall thickness makes standard jaws too aggressive. Dovetail support becomes attractive when you need extreme access and are willing to dedicate material stock for gripping.
- Risers: useful for deeper tool approach, but keep them as short as possible.
- Soft jaws: the safest choice for finished surfaces, thin walls, and repeat part families.
- Dovetail support: best when you need maximum 5-axis access and can design the sacrificial grip feature into the blank.
Common buying mistakes in 5-axis workholding
A common buying mistake is choosing the lowest-profile or highest-force option without checking real part behavior. Clearance, chip evacuation, jaw contact area, and compatibility with your pallet or probing routine often matter more than the headline clamp-force number.
- Oversizing the body: extra vise mass can steal clearance without adding real value for the part family you run most.
- Ignoring jaw strategy: many grip problems come from the wrong jaw style, not the wrong vise brand.
- Skipping the zero-point height check: a vise that works on the table may become a collision risk on a pallet system.
- Buying for one part only: the best choice usually matches a repeat family of parts, not a single ideal sample part.
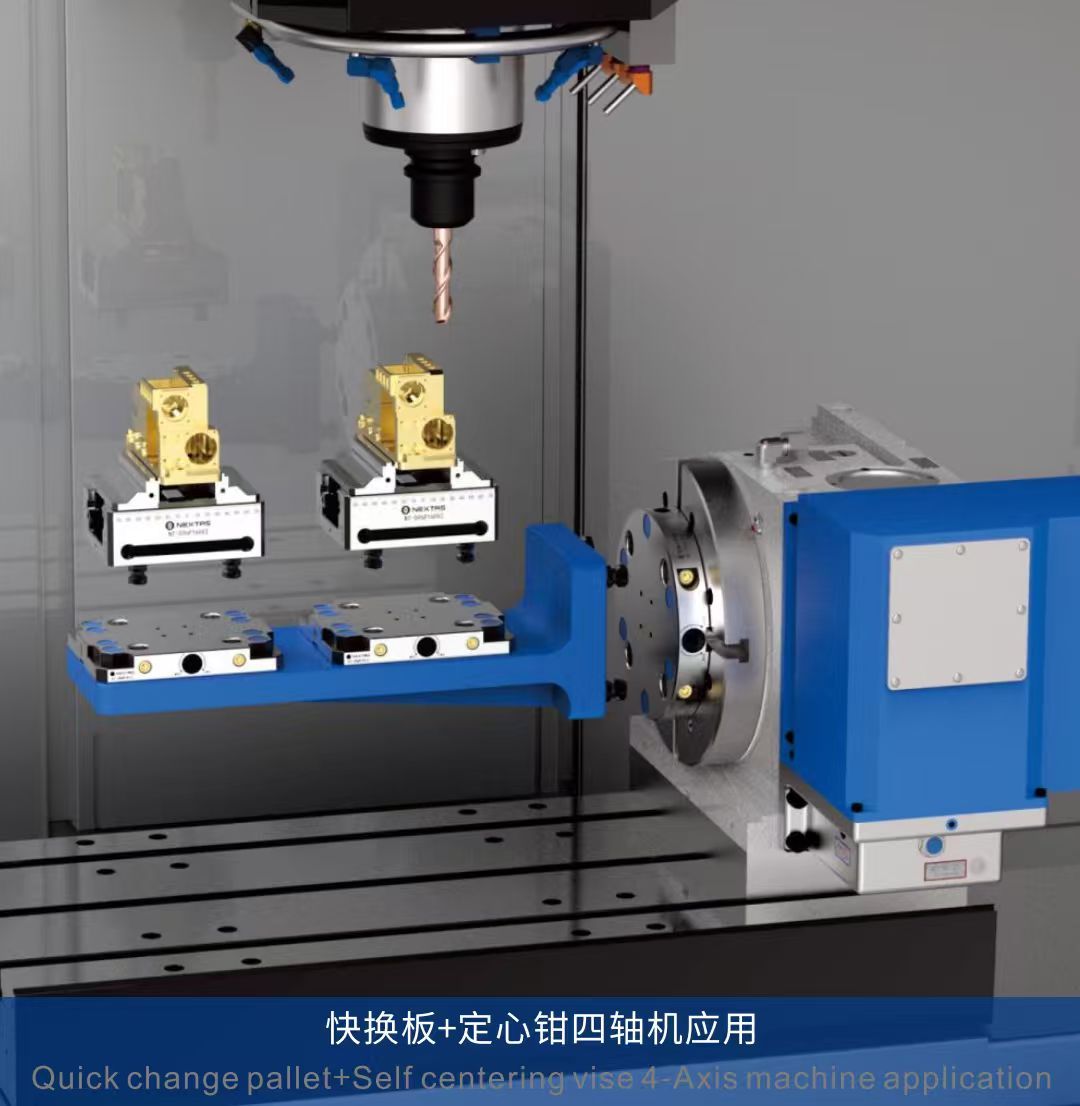
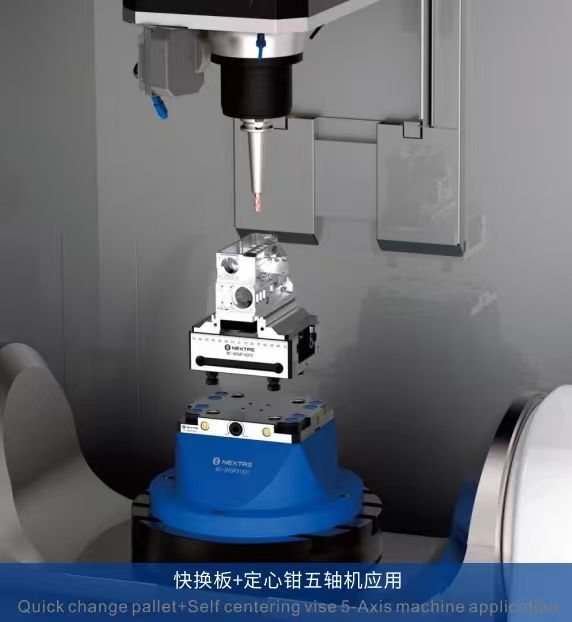
Zero-point integration: cut the alignment time on every changeover
Mold changeovers are often the biggest bottleneck in high-mix production. Traditional workholding requires manual alignment, offset recovery, and repeated proving cuts. A self-centering vise that drops onto a zero-point interface turns that whole sequence into a repeatable load-and-lock routine.
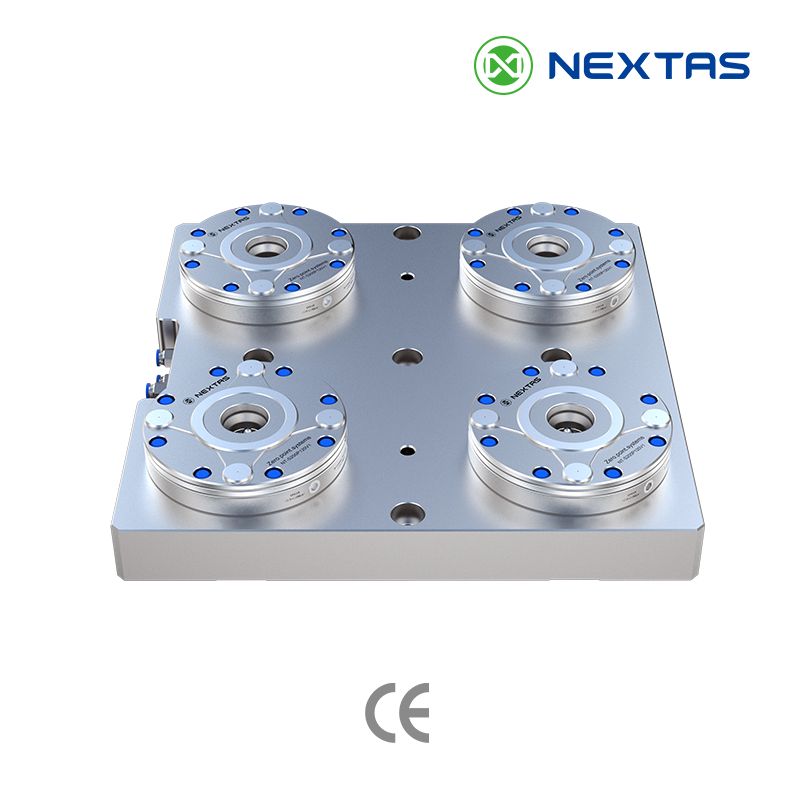
On the current Nextas Tech self-centering vise family, the platform is built around 52 mm or 96 mm modular mounting, repeat positioning accuracy below 0.02 mm at the vise level, and zero-point integration that supports repeatable swaps when the machine-side plate is already standardized. That makes the combination attractive for mold work, part-family changeovers, and palletized 5-axis cells.
What compatibility must include beyond the bolt pattern
Many buyers stop at the words 52 mm or 96 mm, but real compatibility is more than a bolt pattern. The vise, pull-stud strategy, and pallet stack all have to work as one repeatable system.
- Mounting standard: confirm whether the model uses the 52 mm or 96 mm pattern and whether that matches your existing plate family.
- Center height and Z budget: a vise that technically mounts can still be the wrong choice if it pushes the workpiece too high for 5-axis clearance.
- Stud and pallet convention: keep one pull-stud and torque standard across the cell to avoid re-seat drift.
- Probe and tool access: make sure the zero-point plate, vise body, and jaw set still leave room for probing and tool approach.
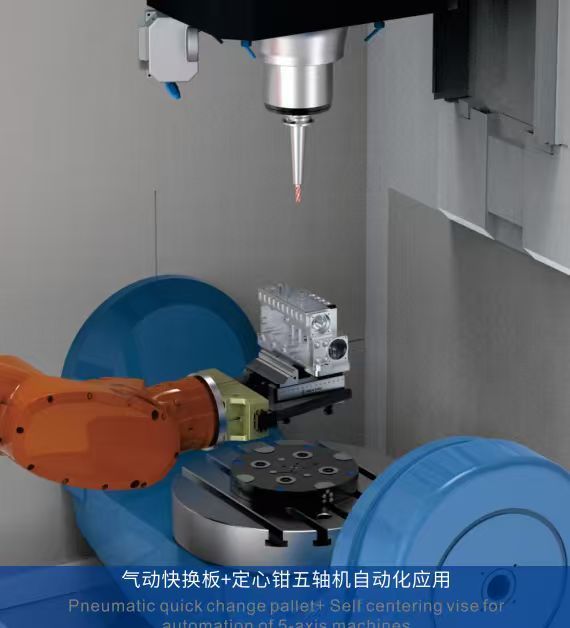
- Automation touchpoints: if robot loading is planned, confirm gripping grooves, cable paths, and unclamp access before ordering.
Where the zero-point and vise combination creates the most value
Mold and die work
Useful when the shop swaps between mold bases, electrodes, and repeat jobs that benefit from a qualified machine-side interface.
Aerospace and precision parts
Repeatable centering plus better multi-face access makes the setup attractive for concentricity-sensitive 5-axis work.
Job shops with mixed part families
The same vise body can move between standard plates instead of forcing every machine to be set up from scratch.
Palletized and robot-loaded cells
Once the machine-side standard is fixed, future automation upgrades become a lot easier to phase in.
Integration notes for zero-point pallets and probes
To get the repeatability you expect, keep the whole stack disciplined. Clean the plate before every reseat, lock one pull-stud standard, and use the same torque process every time. Then verify the real result by probing or indicating after repeated swaps on an actual pallet, not just on the first install.
- Keep chip control strict around the locating faces and pull-stud area.
- Record the real reseat variation across several swaps before approving the process for production.
- Choose jaw styles and risers with the zero-point plate height already in mind.
- For automation plans, define where confirmation signals and gripper access will live before the first build.
Workflow optimization for complex part families
When a shop runs a family of similar but not identical parts, inconsistency in workholding multiplies quickly. Different jaw sets, different touch-off habits, and different operator assumptions can erase the efficiency gains of 5-axis machining. A stable centering strategy is what keeps complex part families scalable instead of chaotic.
How quick-change jaws shorten model-to-model switches
Quick-change jaws matter most when part numbers switch often but the shop still wants to preserve a standard centerline and offset logic. Instead of treating each change as a fresh setup, the team can move between part variants with less teardown, fewer adjustments, and more predictable restart behavior.
- Quick-change jaws swap in seconds, so the spindle is not waiting while an operator wrenches jaws on and off. On many models you can also flip the jaws 180 degrees to open up the clamping range.
- The same vise takes serrated hard jaws for roughing and machinable soft jaws for finishing, so one body handles a range of part shapes and sizes instead of needing a separate vise for each.
- Swapping jaws does not move the centerline. Precision-ground jaw interfaces keep re-clamping variation small from one set to the next.
When multi-station layouts raise spindle utilization
Multi-station layouts make sense when one cycle can cover multiple identical or near-identical parts without sacrificing tool access. In those cases, the gain is not just more parts per cycle but better spindle utilization, less idle time between loads, and easier planning for repeat family jobs.
- A multi-station fixture clamps several parts at once. You can fit 3 to 4 vises on a single 400 mm base and cut them all in one cycle, so the operator loads and unloads less often.
- Loading a batch once instead of part by part keeps an expensive 5-axis machine cutting more of the time and spreads its hourly cost over more parts.
- Fewer clamping cycles also means fewer chances to introduce setup error, so part-to-part variation stays tighter across the batch.
- Most multi-station bases are built to take automation later: they have ports for robot load and unload and bolt onto the same zero-point systems.
Workflow gains beyond the vise
The biggest workflow gain often shows up outside the vise itself: fewer offset resets, more stable inspection baselines, easier operator handover, and less schedule disruption when part mix changes mid-shift. Keeping the datum stable across setups is also what gives you tighter SPC data and less rework when a part moves between machines or operators.
Final recommendation: match the vise to the part family, not the brochure
The best 5-axis vise is the one that fits the way your shop actually machines a family of parts: access needs, jaw-change frequency, support method, and whether the setup must later scale into zero-point or automation workflows.
Need a sizing review?
Send the part envelope, material, and target grip faces
We can help you narrow down vise size, jaw strategy, and whether a zero-point base makes sense before you spend money on the wrong 5-axis stack.