Blog

How to Get the Most From a High-Precision Pneumatic Vise

Installation, automation hookup, jaw strategy, and maintenance — the practical details that decide whether a pneumatic vise actually holds tolerance once it is on the machine.

Published on December 05, 20256 min read
Table of contents
Pneumatic Self-Centering Vise
Featured Product

Pneumatic Self-Centering Vise

P75 / P110 / P150 pneumatic centering vises for CNC automation cells — ≤0.01 mm repeatability, fast pneumatic clamping and robot-ready interfaces.

  • Repeatability ≤0.01 mm typical
  • Pneumatic centering for unattended cells
  • 52 / 96 mm zero-point compatible

A high-precision pneumatic vise is fast and consistent, but getting the most out of one comes down to how you install, integrate, and maintain it — not the vise alone. This guide covers the setup details that decide whether it holds ≤0.01 mm shift after shift.

Operator takeaway
Best fitRepeat jobs that need faster clamping with stable force and minimal variation.
Main gainBetter cycle consistency, easier automation integration, and quicker loading.
Watch-outInstallation quality and jaw strategy matter as much as the vise itself.

1. Where a Pneumatic Vise Fits Best

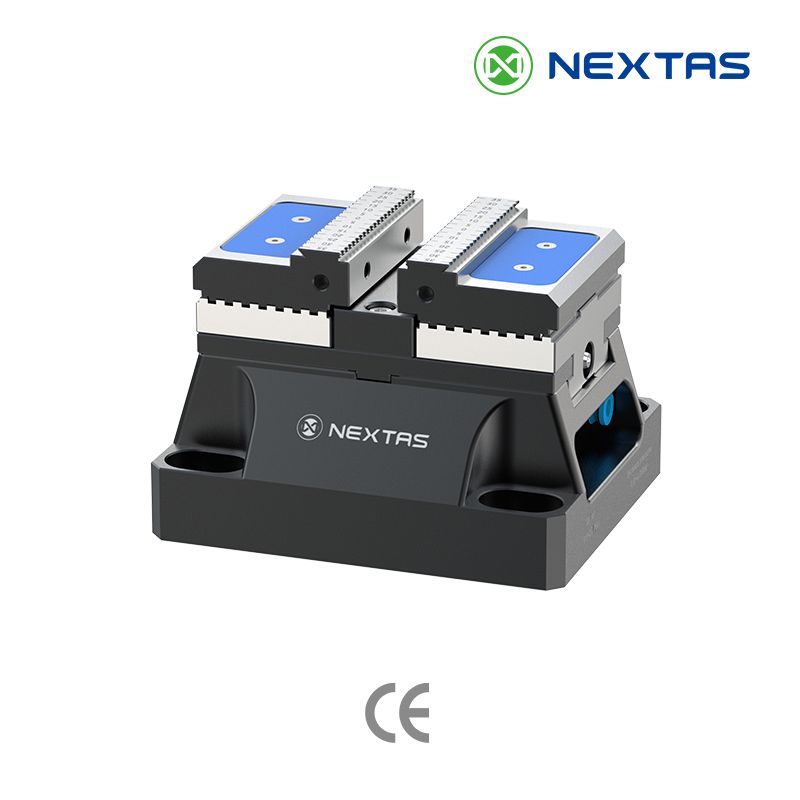
A high-precision pneumatic vise pays off on the right jobs, so it helps to know where it fits before you bolt it down. Nextas Tech’s NPV-160 pneumatic vise, for instance, uses a pneumatic-hydraulic booster system that delivers up to 4000 kgf of clamping force at just 6 bar air pressure. That much holding force suits heavy-duty cutting like mold roughing, where the part has to stay dead still under the tool.

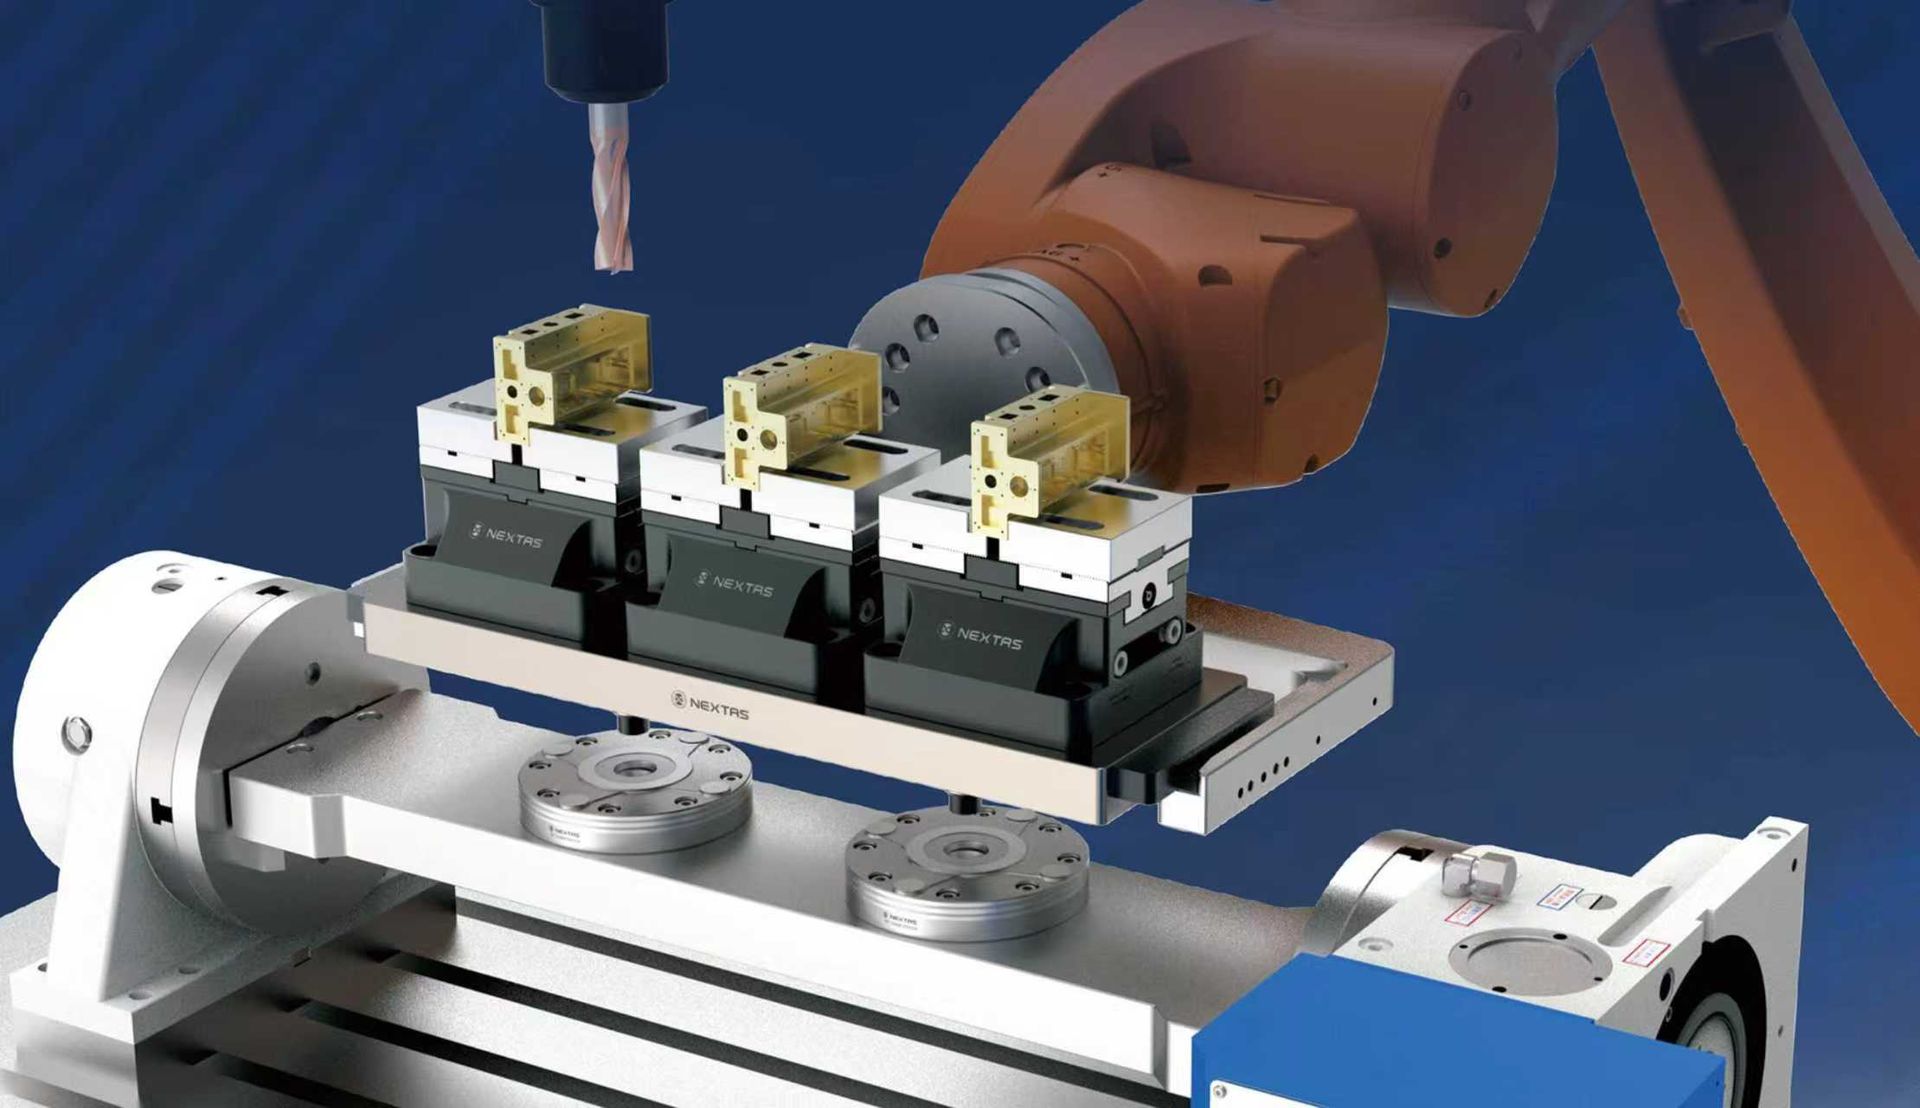
Its ≤0.01 mm repeatability also suits high-volume automotive and electronics work, where the same clamp position has to hold across thousands of parts. For automated machining cells, this vise works well with robotic arm loading and unloading systems. Unlike traditional clamping devices that require manual operation, it can be linked to the machine tool’s M-code via a solenoid valve, enabling unmanned production for extended periods.

Additionally, its compatibility with horizontal machining centers and pallet changers lets you run several workpieces from a single setup, which cuts setup time and lifts part-per-hour output. It is not worth using on light-duty, low-volume work where a basic vise would do—save it for jobs where precision or cycle time is the actual problem.

2. Installation and Automation Hookup

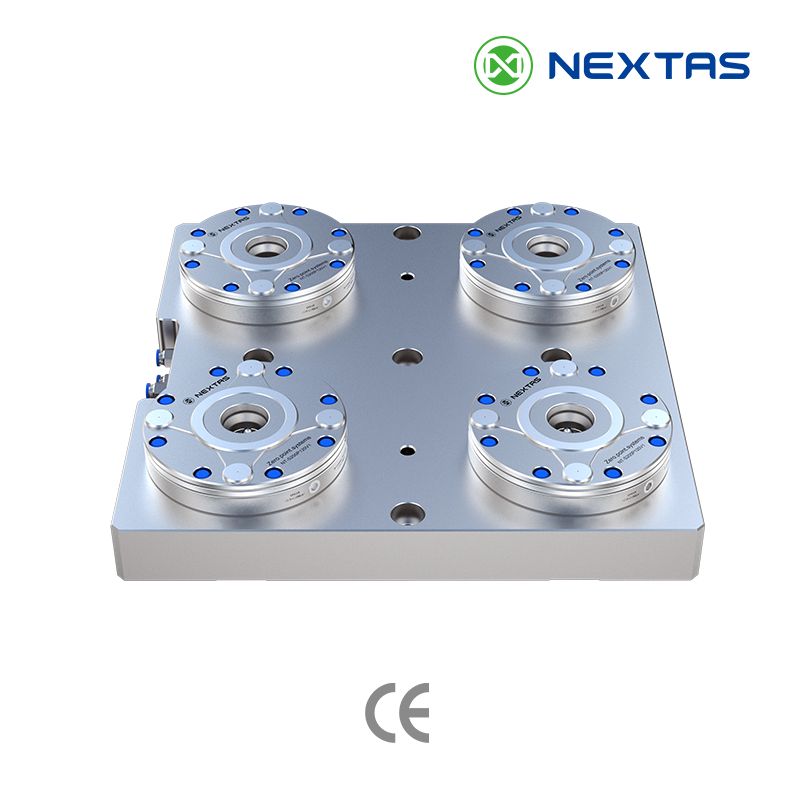
The performance of a pneumatic vise hinges on proper installation and integration with your existing workflow. Nextas Tech’s high-precision pneumatic vise features a precision-ground base with standard keyways and mounting holes, allowing quick and accurate attachment to various machining center T-slot tables. Pair it with a zero-point clamping system and you can swap the whole fixture in seconds instead of re-indicating it, which is where the downtime savings on short runs come from.

Integration with automation systems is another critical aspect. The vise’s pneumatic-hydraulic booster technology eliminates the need for external hydraulic units, simplifying system configuration. By connecting it to your machine’s control system via a solenoid valve, you can automate clamping and unclamping processes, aligning with robotic loading/unloading or fully automated cells.

Watch how Nextas Tech workholding solutions integrate for smooth automated machining.

Ensure your team is familiar with M-code programming for smooth communication, and request CAD files (STEP/IGES or 2D drawings) from the manufacturer and check the fit against your table and tooling before the vise ships.

A good pneumatic-vise setup usually has these basics in place

  1. Stable air supply: Pressure fluctuation creates inconsistent clamping behavior.
  2. Matched jaw choice: Use hard, soft, or dovetail jaws according to the actual part geometry.
  3. Repeatable locating: Pair the vise with a standardized base or zero-point reference when changeovers are frequent.

3. Clamping Strategy by Part Type

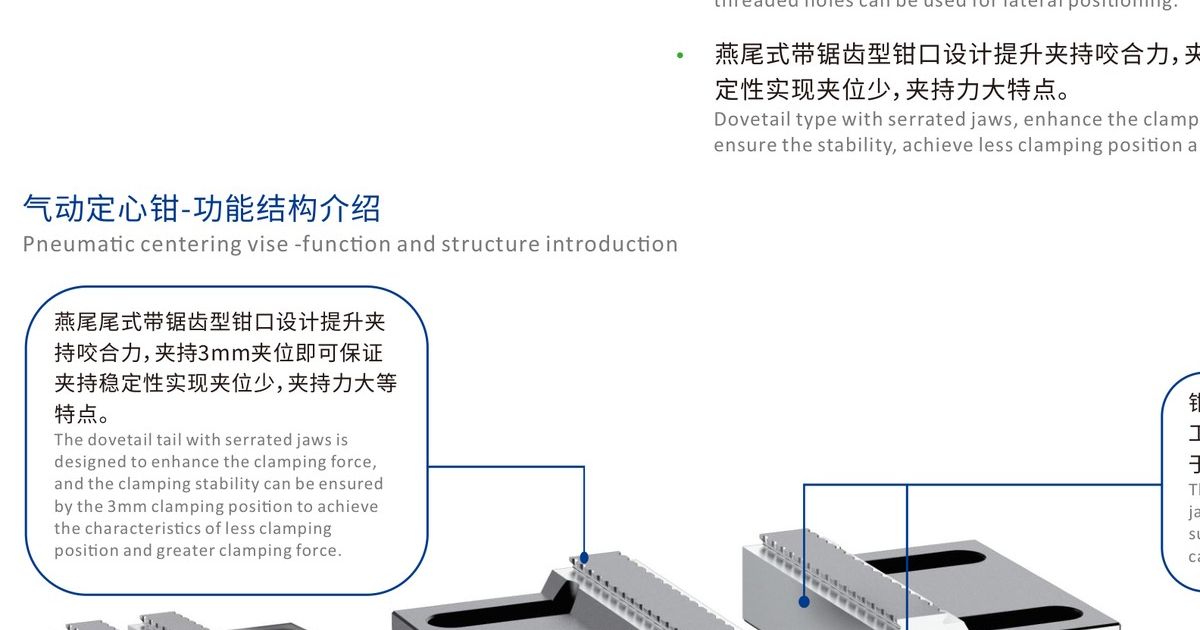
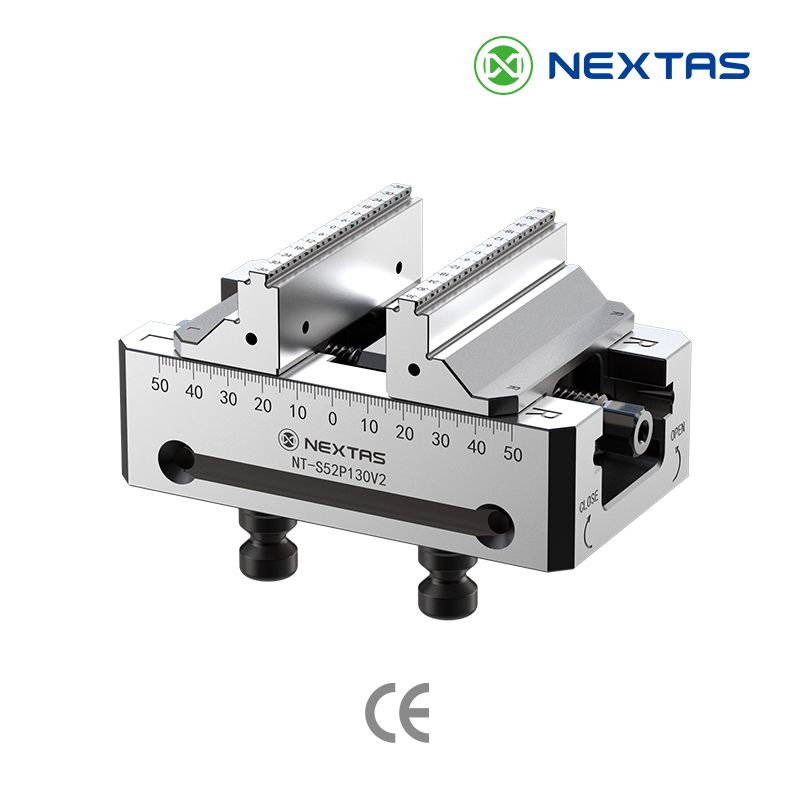
A high-precision pneumatic vise can hold a wide range of parts, but you only get that range if you set up the jaws to match the work. Nextas Tech’s design includes serrated dovetail jaws and a 3mm clamping surface, so the contact area is smaller and the force per unit area is higher, which keeps workpiece deformation low on delicate or thin-walled parts.

Jaw choice is most of what decides which parts the vise can hold well:

  • Hard jaws: Utilize their front and reverse sides for different workpiece geometries. The front side is ideal for standard clamping, while the reverse side accommodates irregular shapes, maintaining a secure grip without damaging machined surfaces.
  • Soft jaws: Machine them to match a complex or fragile part’s contour so the clamp load spreads evenly—useful for medical or aerospace parts where surface finish matters.
  • Lateral positioning: Take advantage of the side threaded holes on solid jaws for auxiliary positioning, enhancing stability during high-feed, deep-cut operations.

Remember, the vise’s FCD60 high-tensile ductile iron body provides excellent vibration damping. Pair that with the right clamping strategy and the workpiece stays put even under heavy cuts, which holds your surface finish and slows jaw and tool wear.

4. Maintenance That Holds Accuracy

A high-precision pneumatic vise is an investment in long-term productivity, and proper maintenance is essential to preserve its accuracy and durability. Nextas Tech’s fully sealed design prevents chips, coolant, and contaminants from entering the internal mechanism—simplifying maintenance but not eliminating it.

Key maintenance practices include:

  • Lubrication: Regularly check the S-shaped oil lubrication system to ensure smooth operation of moving parts. Proper lubrication enhances precision and extends the vise’s service life.
  • Cleaning: After heavy use, use compressed air to clear debris from the clamping surface and guide rails—this protects the serrated jaws and maintains consistent clamping force.
  • Inspection: Periodically verify repeatability and clamping force using calibrated tools. If deviations are detected, refer to the manufacturer’s guidelines for adjustments; the vise’s solid construction allows for long-term recalibration.

Compared to traditional hydraulic vises, the pneumatic-hydraulic booster design has no external hoses or hydraulic fluid to manage, so there is less to leak, top up, or chase down when something acts up.

Need application advice?

Tell us the part and the machine before you commit to a vise size

We can review stroke, jaw style, mounting interface, and automation compatibility so you do not end up with a fast vise that still slows down the whole process.

Conclusion

A pneumatic vise pays off when you match it to the right job. Pick the correct jaw style for your part family, mount it rigidly, keep the air supply clean and the seals in good shape, and the 4,000 kgf clamping force and ≤0.01 mm repeatability will hold up shift after shift.

The biggest gains usually come from removing operator variability—consistent clamping pressure means consistent parts, whether you are running a second shift or feeding the vise from a robot. If you are not sure which vise size or jaw configuration fits your setup, send us your part drawing and machine model and we will walk through the options with you.


Free Resource

Get the free workholding selection guide

Send your work email — we'll send the PDF selection guide + a 1-page workholding checklist within 1 business day. No spam, no obligation.

Reply within 1 business day · No spam · Data used for your enquiry only

Comparison, Selection & Cost Guide (Quick Tables)

Once a pneumatic vise is dialed in, the question becomes whether it's still the right tool for the next job. The tables below compare the alternatives on changeover time, repeatability, automation readiness, and total cost.

Quick comparison: common workholding options

Zero-point system / zero-point clamping plate
Best for
Frequent part changes, multi-part families, modular setups
Strengths
Fast repeatable locating, scalable, automation-ready
Watch-outs
Needs clean interfaces; plan for chip control
Typical changeover
30–120 sec
Pneumatic vise
Best for
High mix + unattended runs where cycle time matters
Strengths
Stable clamping force, easy automation, consistent loading
Watch-outs
Air quality + pressure stability; safety interlocks
Typical changeover
1–3 min
Pneumatic Vise + pressure monitoring
Best for
Lights-out machining with consistent clamping
Strengths
Repeatable force, easy automation, stable loading
Watch-outs
Air quality/pressure stability; add safety interlocks
Typical changeover
1–3 min
Self-centering vise
Best for
Symmetric parts, 5-axis access, quick centering
Strengths
Centers fast, reduces setup errors, good for 5-axis
Watch-outs
Jaw travel limits; verify part envelope
Typical changeover
1–5 min
Hydraulic fixture
Best for
High-volume or high-clamp-force machining
Strengths
Strong & stable, great for tight tolerances
Watch-outs
Higher upfront cost; maintenance & leak checks
Typical changeover
5–20 min
Custom dedicated fixture / jig
Best for
One part, very stable process, repeat production
Strengths
Max stability, lowest unit cost at scale
Watch-outs
Slow to change; redesign needed for new parts
Typical changeover
10–60 min
Pallet changer
Best for
Parallel setup + spindle utilization gains
Strengths
Setup off-machine, better OEE, easier lights-out
Watch-outs
Needs process discipline + pallet standards
Typical changeover
Varies (2–10 min off-machine)
FMS / pallet pool (automation)
Best for
Many SKUs + long unattended windows
Strengths
Best throughput + scheduling flexibility
Watch-outs
Highest system complexity; needs planning
Typical changeover
N/A (system-level)

Fast selection: match your scenario

1–10 pcs, frequent changeovers, < 0.02 mm targets
Recommended setup
Zero-point system + modular base
Notes
Build a “standardized base” and swap top tooling.
10–200 pcs, operator present, mixed geometries
Recommended setup
Self-centering vise or pneumatic vise + soft jaws
Notes
Add quick jaw change + pre-set stops.
200+ pcs, high clamp force, stable part family
Recommended setup
Hydraulic fixture or dedicated fixture
Notes
Optimize for cycle time + tool access.
Lights-out / unmanned shift (2–8+ hours)
Recommended setup
Pneumatic vise + pallet changer or FMS
Notes
Prioritize sensing, chip evacuation, and fail-safe clamping.

What affects price (and how to control it)

Air prep + sensors
Why it changes price
Dry/clean air and monitoring prevent scrap & downtime
How to reduce cost
Use a shared FRL station; start with basic pressure switch.
Repeatability requirement (e.g., ≤0.01 mm)
Why it changes price
Tighter repeatability needs higher precision interfaces and QC
How to reduce cost
Standardize datums; use proven modules; avoid over-spec.
Changeover frequency
Why it changes price
More swaps reward quick-change systems (ROI grows fast)
How to reduce cost
Measure setup time; prioritize the biggest bottleneck.
Automation level (sensors, interlocks, palletization)
Why it changes price
Adds hardware + integration time
How to reduce cost
Start with one cell; reuse components across machines.
Workpiece size & material
Why it changes price
Large/heavy parts need stronger clamping + bigger bases
How to reduce cost
Use modular plates; right-size the fixture footprint.
Engineering time (custom vs modular)
Why it changes price
Custom design drives NRE cost
How to reduce cost
Prefer modular stacks; keep custom parts minimal.

Common mistakes (and quick fixes)

Running with wet/dirty air

Symptom: Force drift, sticking, inconsistent clamp

Fix: Add filter/dryer; schedule drain checks.

No pressure monitoring

Symptom: Random scrap during nights/weekends

Fix: Install pressure switch + interlock the cycle.

Skipping chip control on locating surfaces

Symptom: Repeatability drifts; “mystery” setup errors

Fix: Add air blast, covers, and a cleaning routine.

Over-clamping thin parts

Symptom: Warping, chatter, tolerance issues

Fix: Use proper jaw support + controlled clamping force.

No standard datum / pallet standard

Symptom: Every setup becomes a one-off

Fix: Define a shop standard (datums, pallet, bolt pattern).

Choosing by lowest price only

Symptom: Higher labor cost + downtime

Fix: Evaluate total cost: labor, scrap, changeover time.

Want a recommendation for your parts? Send us your machine model, material, and tolerance target — we’ll suggest a practical setup.

Frequently Asked Questions

What is the advantage of the pneumatic-hydraulic booster system over traditional hydraulics?

The pneumatic-hydraulic booster system allows the vise to generate massive clamping force (up to 4000 kgf) using standard shop air pressure (typically 6 bar). This eliminates the need for expensive, bulky, and messy external hydraulic power units and hoses. It simplifies installation, reduces maintenance (no hydraulic fluid leaks), and lowers energy consumption while maintaining the high holding power required for heavy milling.

Can Nextas Tech pneumatic vises be integrated into a fully automated robotic cell?

Yes. Our vises are designed with automation in mind. They can be connected to the CNC machine’s controller via solenoid valves, allowing for M-code activation. This means the clamping and unclamping cycles can be synchronized with a robot arm for loading and unloading parts, enabling 24/7 lights-out manufacturing.

How do I ensure the clamping force doesn't deform delicate parts?

Precision control is a key feature. While the booster can provide high force, the input air pressure can be regulated to adjust the clamping force output. For delicate or thin-walled parts, we recommend lowering the air pressure and utilizing soft jaws. Soft jaws can be machined to the exact negative shape of your workpiece, distributing the clamping force over a larger surface area to prevent deformation while maintaining a secure hold.

What is the expected service life and maintenance interval?

With proper care, Nextas Tech pneumatic vises are built to last for many years in demanding industrial environments. The body is made of FCD60 ductile iron for high rigidity. The internal mechanism is fully sealed against chips and coolant. We recommend a weekly check of the air supply and lubrication levels, and a daily cleaning of the slide ways with compressed air. A more thorough inspection of the seals and force calibration is recommended annually or every 2,000 operating hours.

Keep exploring

Keep reading with closely matched guides on vise selection, repeatability, jaw strategy and multi-face machining workflow.

Browse all articles →

Match the hardware

These product pages are the most direct next step if you are comparing vise hardware, quick-change compatibility and real production fit.

Browse all products →

Planning a pneumatic clamping setup?

Tell us your workpiece range, cycle time, and control method. Our engineering team can help review whether a pneumatic vise is the right fit for repeatable clamping and unattended machining.

Request Pneumatic Vise Advice →