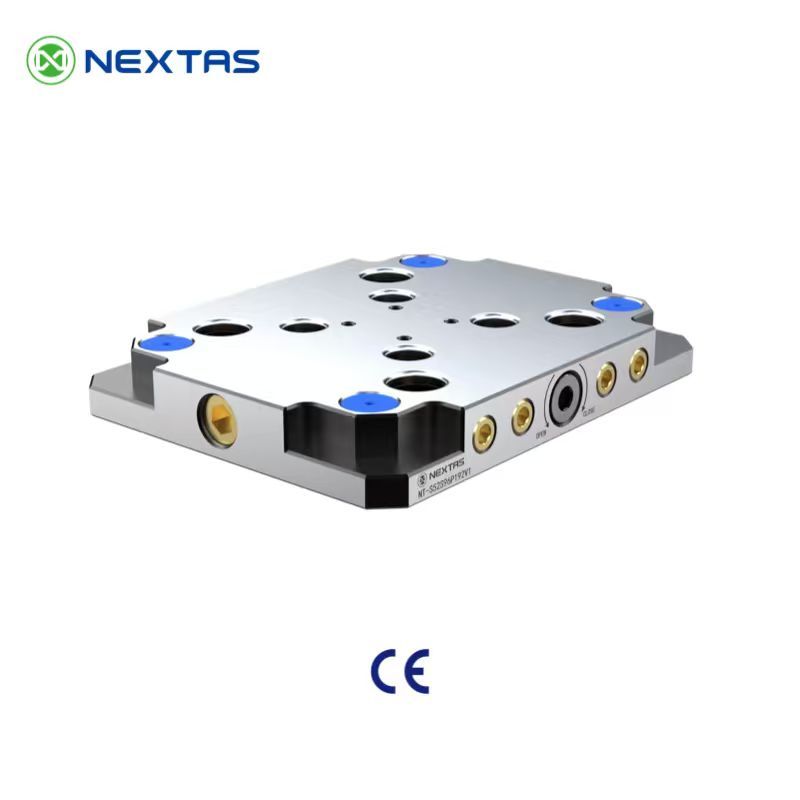
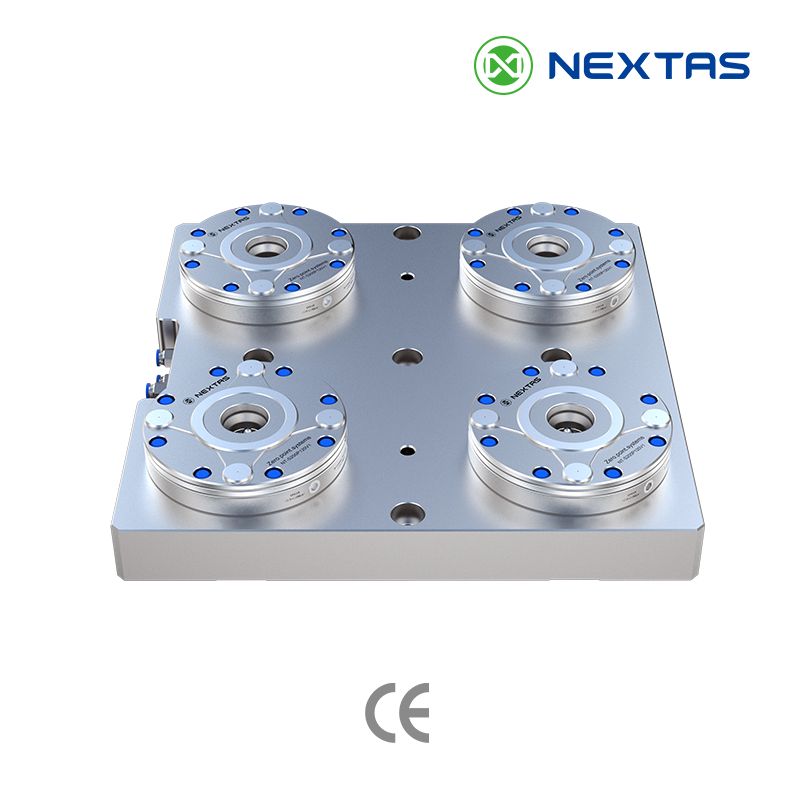
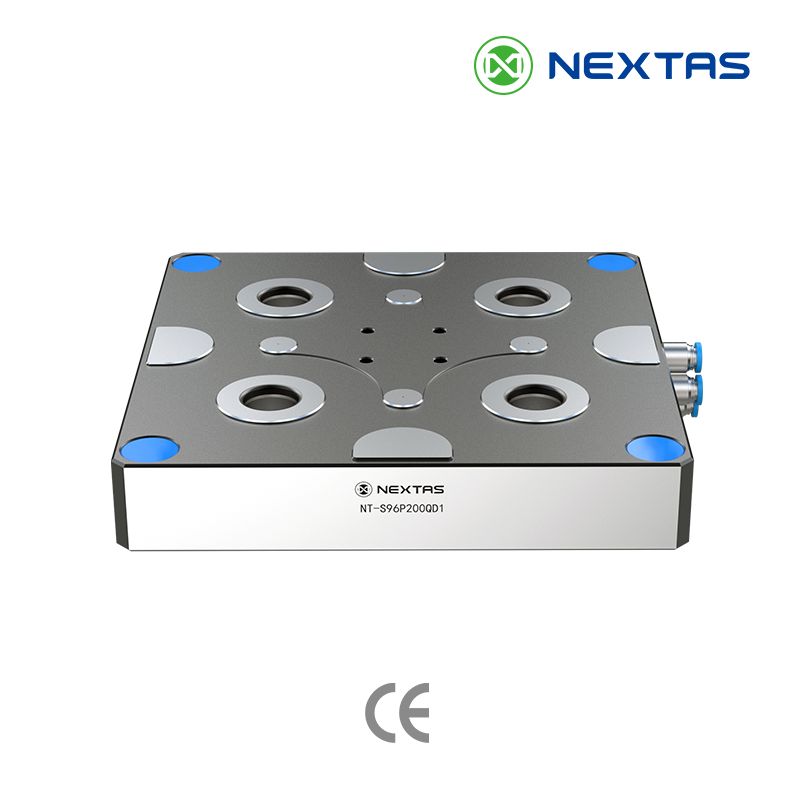
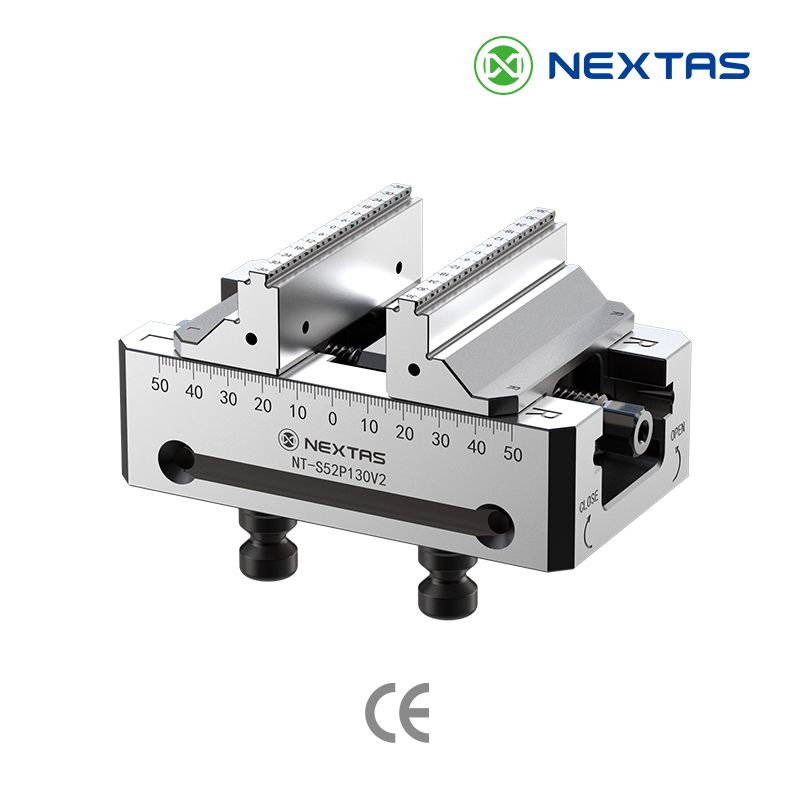
Modular Workholding Foundation

Quick-Change Zero-Point Clamping Plate

52 / 96 mm datum plate family for faster fixture and pallet changeovers

Use this family when you want one repeatable plate interface under vises, pallets, and modular fixtures. It is the easiest path to cleaner changeovers now while keeping the door open for a later upgrade into a more automated zero-point workflow.

This plate is the mechanical, manual-actuation entry point — no air supply required, finished and ready to bolt down. If your line needs machine-controlled robot or APC release, compare the separate Pneumatic Zero-Point Plate; if you would rather buy bare receiver modules to drop into your own subplate, see the Zero-Point Clamping Systems page.

52 / 96 mmfamilies
Vise, pallet & fixture base
Manual first, automation-ready later
Lead time: confirmed in quote MOQ: 1 set Payment: T/T · L/C Quality documents scoped at RFQ MIC Audited Supplier

Zero-point plate decision guide

Best fit

Choose this page when the machine table needs one repeatable datum standard

It is the cleanest first step for vises, pallet plates, and modular fixtures that need faster swaps without forcing a full automation project on day one.

Compare first

Check 52 / 96 mm family, plate footprint, and future upgrade path

That comparison usually tells buyers whether a manual datum plate is enough now or whether a pneumatic or APC-ready route should be planned earlier.

Go next

Use the shortcuts instead of scanning the whole page

Jump straight into selection, integration, and maintenance when layout planning is the real decision bottleneck.

MANUAL PLATE SELECTION

Choose the 52 mm or 96 mm manual datum family first

The products specified on this page are manually released and need no compressed-air connection. Choose the datum family by load, footprint, and the pallet or fixture interface you want to standardize.

52 mm manual family

Use the compact 20 kN family for smaller pallets, vises, multi-station layouts, and 5-axis setups where footprint and mass matter.

96 mm manual family

Use the larger 30 kN family when the fixture footprint, workpiece load, or cutting forces call for a wider and more rigid datum base.

Need automatic release?

Treat that as a separate pneumatic integration decision. Confirm air supply, valve logic, clamp sensing, interlocks, and the exact pull-stud interface instead of assuming the manual models on this page can be air-actuated.

Compare the pneumatic zero-point plate →

Plate Specifications & Model Matrix

Plate family overview — technical data
Family Repeat Positioning Accuracy Clamping Force Fixed Indexing Material Unlocking Method Adaptive Spigot
52 mm quick change datum plate family<0.005 mm20,000 N4 × 90°Hardened stainless steelManualNT-S52P16V1
96 mm quick change datum plate family<0.005 mm30,000 N4 × 90°Hardened stainless steelManualNT-S96P20V1
Module pattern52 mm / 96 mm industry-standard modular spacing used across vises, plates, and compatible pallets
Compare all 21 plate models and interface accessoriesOpen the complete dimensions, clamping force, matching spigot, weight, and accessory rows.
Plate model catalog — technical data
Product Code Plate Type Family Clamping Force Spigot Weight
NT-S52P125V1P125 quick change datum plate52 mm20,000 NNT-S52P16V12.8 kg
NT-S52P150V1P150 quick change datum plate52 mm20,000 NNT-S52P16V13.0 kg
NT-S52P150V2P150 raise 60 quick change datum plate52 mm20,000 NNT-S52P16V16.9 kg
NT-S52P150V3P150 raise 100 quick change datum plate52 mm20,000 NNT-S52P16V111.5 kg
NT-S52P213V1P213 dual-station plate52 mm20,000 NNT-S52P16V14.2 kg
NT-S52P208V1P208 four-station plate52 mm20,000 NNT-S52P16V18.2 kg
NT-S52P290V1P290 5-axis three-station plate52 mm20,000 NNT-S52P16V115.0 kg
NT-S52P125V2φ125 quick change datum plate52 mm20,000 NNT-S52P16V12.2 kg
NT-S52P160V1φ160 quick change datum plate52 mm20,000 NNT-S52P16V13.5 kg
NT-S52P315V1P315 raise seat quick change datum plate52 mm20,000 NNT-S52P16V19.1 kg
NT-S96P192V1P192 quick change datum plate96 mm30,000 NNT-S96P20V15.4 kg
NT-S96P315V1P315 raise seat quick change datum plate96 mm30,000 NNT-S96P20V116.0 kg
NT-S96P192V2P192 quick change datum plate96 mm30,000 NNT-S96P20V17.5 kg
NT-S96P330V1P330 dual-station plate96 mm30,000 NNT-S96P20V110.0 kg
NT-S96P192V3P192 raise 60 quick change datum plate96 mm30,000 NNT-S96P20V111.7 kg
NT-S96P330V2P330 four-station plate96 mm30,000 NNT-S96P20V122.0 kg
NT-S96P192V4P192 raise 100 quick change datum plate96 mm30,000 NNT-S96P20V119.3 kg
NT-S96P176V1φ176 quick change datum plate96 mm30,000 NNT-S96P20V14.5 kg
NT-S96P246V1P246 dual-station indexing plate96 mm30,000 NNT-S96P20V19.5 kg
NT-S96P390V1P390 5-axis three-station indexing plate96 mm30,000 NNT-S96P20V137 kg
NT-S52P100V1P100 positioning three-jaws chuck52 mm4 × 90° fixed indexingNT-S52P16V14.4 kg

Positioning spigots and indexing accessories

Several buyers stop at the plate body, but the catalogue also shows the matching positioning pieces that determine how the plate is actually used on the machine.

Positioning spigots and indexing accessories — technical data
Accessory Model Specification Why it matters
52 mm positioning spigotNT-S52P16V152 × 52 mm, hardened stainless steel, 0.15 kgStandard interface part used across the 52 mm manual plate family.
96 mm positioning spigotNT-S96P20V196 × 96 mm, hardened stainless steel, 0.2 kgMatching reference part for the 96 mm manual plate family.
P32 positioning locked mouthNT-S52P32V1<0.01 mm clamping accuracy, 4 × 90° fixed indexingUseful when the project needs indexed positioning logic, not just a flat datum plate.
Positioning three-jaws chuckNT-S52P100V14 × 90° fixed indexing, manual familyLets the same 52 mm interface handle round or indexed workholding tasks.
Zero-Point Clamping Plate

A flat, rigid base for every fixture

The NEXTAS Zero-Point Clamping Plate serves as the link between your machine tool and your workholding. The manual plate family uses hardened stainless-steel locating interfaces and 52 mm / 96 mm datum standards to create a repeatable base for vises, pallets, and fixtures. It does not require a shop-air connection; buyers who need automatic release should compare the separate pneumatic plate family.

52mm/96mm Industry-Standard Module Design

The manual zero-point plate adopts a 52 mm / 96 mm industry-standard module design for strong compatibility with global CNC machining tooling systems. This standardization avoids custom adaptation troubles, enabling straightforward integration into both small workshops and large manufacturing setups. The two module sizes cover different workpiece weights and sizes, so one standard fits a wide span of jobs. Spare parts are widely available, which keeps maintenance simple. For shops standardizing their fleet, it cuts the downtime that comes from mismatched tooling.

Model-specific product view

Inspect the NT-S52P160V1 Manual Zero-Point Plate

This 20-second close-up shows the Ø160 plate body and manual interface. It supports visual model review only; use the specification table, interface drawings and project verification to confirm dimensions, clamping force, matching spigot and application fit.

NT-S52P160V1Ø160 format0:20
Compare Published Model Data
A 20-second close-up of the NT-S52P160V1 manual zero-point plate for visual review; model dimensions, force, interfaces and application fit require separate verification.

Selection, Installation & Maintenance

A zero-point clamping plate is more than a “base plate” — it becomes your standardized machine interface. Picking the right configuration upfront helps you get repeatable accuracy, faster changeovers, and a cleaner path to palletization.

Open the full selection, installation, and maintenance guideReview mounting, grid planning, the manual-to-pneumatic boundary, troubleshooting, and CNC-to-CMM transfer checks.

1) Plate size & mounting

Match the plate footprint to your table travel and T-slot pattern. Consider clearance for toolpaths, coolant flow, and chip evacuation. For frequent swaps, many shops standardize one “home” plate per machine.

2) Module layout & grid

Choose an industry-standard 52 mm / 96 mm pattern when you want broad compatibility with pallets, vises, and fixtures. Need larger parts or heavier cuts? Step up from the 20 kN 52-family plates to the 30 kN 96-family layouts, or increase the number of stations.

3) Workholding style

If you run high-mix production, prioritize quick-change vises and standardized pallets. For 4/5-axis work, focus on rigidity, Z-height, and repeatable locating — so parts can move from CNC to CMM without re-fixturing.

Zero-Point Plate vs. Traditional T-Slots

Changeover time
T-slot setups
Manual indicating & alignment
Zero-point clamping plate
Swap pallets/fixtures in minutes
Repeatability
T-slot setups
Operator-dependent
Zero-point clamping plate
Consistent positioning (when cleaned & maintained)
Scalability
T-slot setups
Hard to standardize across jobs
Zero-point clamping plate
Standard interface for pallets, vises, and fixtures
Inspection workflow
T-slot setups
Often requires re-fixturing
Zero-point clamping plate
CNC → CMM on the same pallet/zero reference

If your shop does frequent job changes, short runs, or wants a clear path to automation, a zero-point clamping plate usually pays back by increasing spindle uptime and lowering setup variability.

Installation & Maintenance Checklist

  1. Mount, level & torque: Confirm that the mounting surface is clean, flat, and suitable for the specified bolt and locating pattern. Measure the installed plate, follow the approved torque specification, and tighten in a star pattern with a calibrated torque wrench.
  2. Check manual release access: Confirm the release tool has unobstructed access and that every receiver opens and returns smoothly. Recheck access at full machine travel with guarding, probes, and adjacent fixtures installed.
  3. Verify engagement & orientation: Load the matched studs, confirm full seating, and test the manual lock / release sequence. Use the approved drawing and inspection method to verify indexing before production.
  4. Keep interfaces clean: Chip management is everything. A quick wipe or air blow-off before loading improves repeatability.
  5. Routine checks: Inspect locating surfaces, studs, release points, fasteners, interface wear, and corrosion on a schedule based on your coolant and chip conditions. Stop and inspect the mechanism if release effort rises or the pallet lifts unevenly.

Tip: If you plan to expand into pallet pools or automation, standardize plate patterns and pallet interfaces early — it saves rework later.

Plate configuration planner (modules, grid, and use-case)

Use this quick planner when you’re selecting a manual zero-point clamping plate for CNC changeovers, palletization, or 5-axis fixtures. The goal is to standardize a repeatable interface (plate + pallet/fixture) while keeping tool clearance, chip evacuation, and access to the manual release practical.

High-mix VMC (quick-change vise)
Recommended layout
Standard 52 mm / 96 mm grid aligned to the vise base; keep the manual release accessible
Why it works
Fast swaps without indicating; consistent work-offset recovery run to run
Notes
Add a simple cleaning routine (blow-off + wipe) before every load
HMC tombstone (multi-face)
Recommended layout
Wider module spread; symmetrical placement under the tombstone footprint
Why it works
Improves rigidity for heavy cuts and multi-side machining
Notes
Plan for coolant/chip flow so locating faces stay clean
5-axis fixture (low Z-height)
Recommended layout
Low-profile plate + compact fixture base; modules positioned for tool clearance
Why it works
Maintains reach and avoids collisions on trunnion/tilting setups
Notes
Prioritize stiffness and access for probing & in-process checks
Future pallet pool / robot loading
Recommended layout
Standardize the pallet pattern now, then move to the pneumatic plate family when automatic release is required
Why it works
Preserves the datum strategy without implying that this manual plate can actuate a robot cell
Notes
Confirm pallet mass, air logic, clamp sensing, and machine interlocks during the pneumatic upgrade review
CNC → CMM transfer pallet
Recommended layout
Mirror the plate pattern on the inspection side; keep datum features consistent
Why it works
Minimizes re-fixturing error and supports true-position verification
Notes
Track re-seat variation after cleaning to validate real-world repeatability

When to stay manual — and when to upgrade to pneumatic

This page covers the manual-release plate family. It needs no compressed-air connection. Use the comparison below to decide whether the simpler manual route is sufficient or whether your project should move to the separate pneumatic zero-point plate.

Stay with the manual plate
Best fit
Operator-loaded machines, offline presetting, inspection transfer, and lower changeover frequency
Utility requirement
No shop-air connection; keep the release point accessible
Upgrade to the pneumatic plate
Best fit
Robot loading, pallet pools, frequent cycling, or machine-controlled release
Integration review
Confirm clean-air supply, valve logic, clamp sensing, and machine interlocks for the selected pneumatic model
Keep the datum standard
Plan now
Standardize pallet orientation, stud family, and mounting pattern before adding automation
Why it matters
A controlled interface reduces rework when the actuation method changes later

Compare the pneumatic zero-point plate →

Troubleshooting repeatability & clamping issues

When a manual plate is used for high-mix CNC machining, small issues compound: chips on locating faces, uneven mounting torque, an obstructed release point, or mismatched studs. This table helps you diagnose the most common symptoms quickly.

Repeatability drifts after chip-heavy jobs
Likely cause
Chips/debris on locating faces or under fixture base
Quick fix
Blow-off + wipe locating surfaces; re-seat and re-check
Preventive habit
Add a “clean-before-clamp” step to every changeover
Stud will not seat or engagement feels uneven
Likely cause
Debris in the receiver, a mismatched stud, or incomplete manual release
Quick fix
Unload, clean the interfaces, confirm the stud family, and repeat the manual release / lock sequence
Preventive habit
Label matched plate and stud families and verify full seating before machining
Fixture rocks / uneven seating
Likely cause
Mounting surface not flat/clean, or torque pattern distorts the plate
Quick fix
Loosen, clean, re-torque in a cross pattern
Preventive habit
Use consistent torque tools and a documented mounting procedure
Manual release feels stiff
Likely cause
Packed chips, dried coolant residue, or side load on the pallet
Quick fix
Remove cutting load, clean the receiver, and operate the release only with the specified tool and procedure
Preventive habit
Keep release access clear and include a functional check in the setup routine
Pallet will not release cleanly
Likely cause
Residual cutting load, chips around the stud, or uneven lifting
Quick fix
Stop the machine, support the pallet evenly, clean around each interface, and repeat the approved manual release sequence
Preventive habit
Define a safe lift point and never force the pallet while a receiver remains engaged

Typical tolerance workflow (CNC → CMM → CNC)

A zero-point clamping plate shines when it becomes your standardized datum interface — letting a part stay on the same pallet/fixture from machining to inspection and back again. This reduces re-fixturing error and makes repeatability a measurable capability.

  1. Lock the datum strategy early: Define A/B/C datums (or a probing datum scheme) and keep it consistent across CNC programs and inspection routines.
  2. Machine on the pallet: Rough + finish while referencing the same locating features. Record offsets and any in-process probe results.
  3. Inspect on CMM without re-fixturing: Move the pallet/fixture to CMM and verify critical features, true position, and flatness — aligned to the same datum set.
  4. Feed results back to CNC: Update wear offsets or apply controlled corrections for the next cycle. Repeat the same locating sequence to confirm stability.
  5. Document capability: Track clamping repeatability, offset drift, and re-seat variation (especially after chip-heavy operations).
Probe/CMM alignment notes
Ensures a consistent CNC → CMM datum transfer workflow
Offset history (wear + correction)
Shows stability and helps reduce scrap on repeat jobs
Re-seat variation after cleaning
Validates zero-point clamping plate repeatability in real conditions

Common CMM / inspection features to verify (GD&T)

When the part stays on the same pallet/fixture, you can monitor GD&T trends across runs, catch drift early, and reduce re-fixturing risk.

  • True position for holes, dowels, and bolt patterns
  • Flatness of reference faces / sealing surfaces
  • Perpendicularity between critical faces and bores
  • Parallelism for mating surfaces and stack-ups
  • Concentricity / coaxial alignment for bores
  • Surface profile on complex or sculpted areas
  • Runout (circular / total) on rotating features
  • Re-seat variation after cleaning and re-clamping

APPLICATION FIT

Where manual zero-point plates fit

Review the fixture, machine envelope, chip flow, release access, and transfer routine together before standardizing the plate interface.

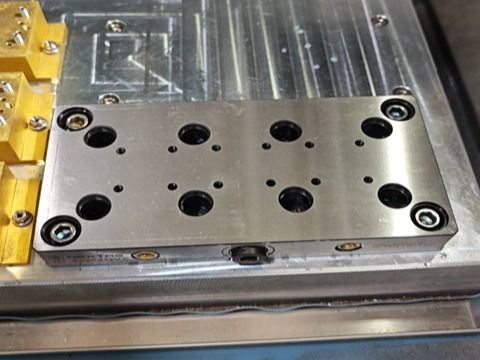
Pairs with self-centering vises for fast reseats

A key advantage of the manual zero-point plate is how directly it pairs with self-centering vises: the plate holds a pre-set zero reference, so the vise reseats in seconds instead of being re-aligned by hand every time. Traditional setups need repeated manual alignment, which is time-consuming and error-prone, harming part quality. When paired with a self-centering vise, the plate uses pre-set zero references and auto-centering, letting operators fix workpieces in seconds. This is vital for high-mix, low-volume production with frequent job changes, as it increases machine utilization and output while maintaining precision.

Zero-Point Clamping Plate 2
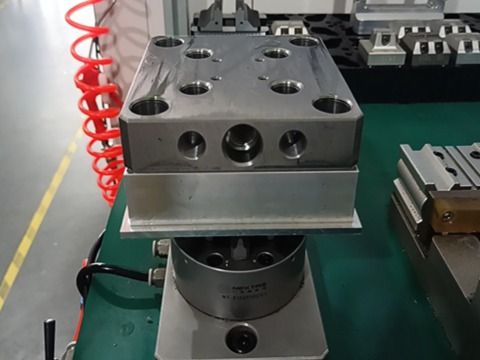
Zero-Point Clamping Plate 3

Works on Vertical & Horizontal MCs and 3/4/5-Axis Machines

The manual zero-point plate is highly versatile, fitting vertical/horizontal machining centers (VMCs/HMCs) and 3-axis, 4-axis, 5-axis CNC systems. In vertical machining, it stabilizes workpieces for milling, drilling, and tapping. In horizontal setups, it uses gravity to support longer/heavier workpieces. For complex 4/5-axis tasks like contouring, its precise alignment ensures quality. It serves industries like automotive, aerospace, and medical device manufacturing, eliminating the need for multiple specialized tools, reducing costs, and simplifying inventory management.

Horizontal Machining Centers (HMCs)

Use clamping plates as the base for tombstone fixtures, allowing you to prepare and load an entire multi-part setup offline and swap it into the machine in minutes.

Vertical Machining Centers (VMCs)

Equip your VMC with a clamping plate to rapidly switch between different vises, 4th-axis rotary tables, or custom job-specific fixtures without lengthy re-alignment procedures.

Automation Upgrade Path

The manual plate can establish the pallet datum standard before automation, but it does not provide robot-controlled release. For a pallet pool or robotic loader, move to the separate pneumatic plate and validate the air circuit, clamp sensing, interlocks, pallet mass, and full loading sequence.

CMM & Inspection

Transfer a workpiece from the CNC to the CMM on the same pallet, using a verified matching plate as the reference. This reduces re-fixturing steps; each station still needs an accepted alignment and measurement routine.

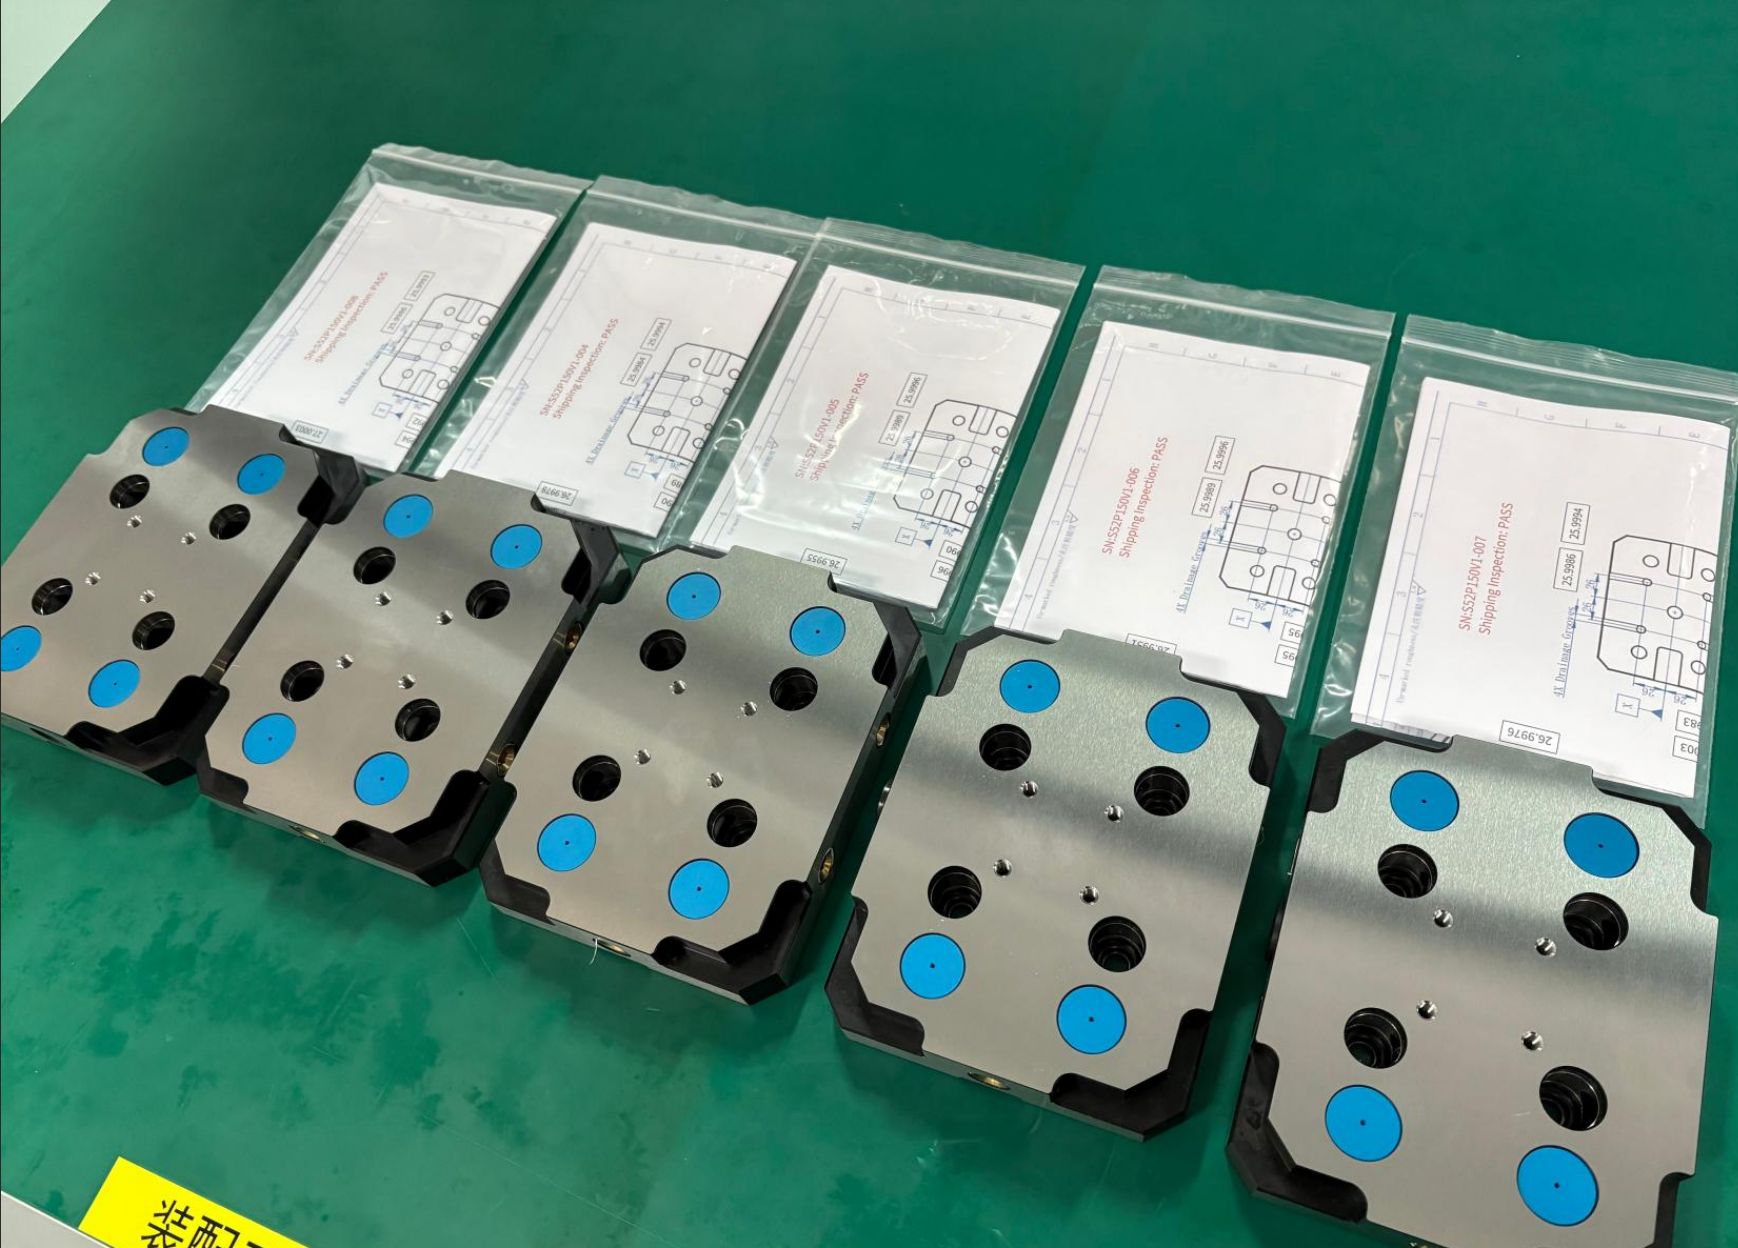
Zero-Point Clamping Plate 4

Application References

Zero-Point Clamping Plate case 1 Zero-Point Clamping Plate case 2 Zero-Point Clamping Plate case 3 Zero-Point Clamping Plate case 4 Zero-Point Clamping Plate case 5 Zero-Point Clamping Plate case 6

Product Data & Evaluation Checklist

A clamping plate is your foundation—buyers should validate flatness, hardness, stud pattern, and real setup gains.

Key specifications

Plate role
Universal base plate for repeatable quick-change setups
Interface
Receiver layout to match your zero-point standard
Reference face
Precision ground surface for stable datum transfer
Clamping action
Manual release on the models listed on this page; pneumatic models are reviewed separately
Mounting
Through holes / threaded patterns (varies by size)
Configuration review
Confirm stud pattern, mounting pattern, footprint, and release access before ordering

Tip: include your machine table size, current fixture style, and changeover-time target. We’ll recommend the right plate format and stud layout.

Compatibility & standards

  • Pairs with zero-point receivers and pull studs across your shop standard.
  • Works with vises, dovetail fixtures, chucks, tombstones, and custom plates.
  • Designed for repeatability when removing/reinstalling fixtures across machines.

Measured outcomes (before → after)

  • Changeover time reduction: eliminate repeated re-indicating between jobs.
  • More spindle uptime: more cutting time, less setup downtime.
  • Better consistency across shifts: standardized mounting reduces variation.

Workholding configuration

  • Define pattern: receiver positions, stud locations, and tool clearance.
  • Datum plan: how the plate references machine table/pallet and part datums.
  • Access planning: ensure 5-side reach, chip evacuation, and coolant flow.

Evidence & proof

  • Plate drawing with receiver pattern and flatness requirements.
  • On-table photos showing fixture swap and repeat setup.
  • Verification checklist: flatness, parallelism, and re-clamp repeat tests.

Delivery & support

  • Standard sizes available; custom patterns supported for OEM fixtures.
  • Packing options: protective carton / wooden case for heavy plates.
  • After-sales: pattern expansion guidance and spare stud/receiver planning.

Resources & Downloads

Frequently Asked Questions

01 How does a zero-point plate reduce setup time vs. traditional T-slots?

The plate keeps a fixed datum on the machine, so a fixture or pallet fitted with matched studs can be removed and reseated without indicating it from the beginning each time. This manual family still requires an operator to release and secure the interface, but it removes much of the repeated alignment work.

02 What is the typical repeatability I can expect from this clamping plate?

The listed 52 mm and 96 mm manual families are specified at <0.005 mm repeat positioning accuracy. The achieved result also depends on the matched stud, mounting flatness, cleanliness, fixture stiffness, and the acceptance method used on your machine.

03 What material is used for the models listed on this page?

The model table lists hardened stainless steel for the standard manual families. If weight or a non-standard material is part of the project, treat it as a configuration request and confirm the final drawing, material grade, and load limits before ordering.

04 Can I use the same interface for 4th / 5th-axis fixtures and CMM transfer?

Yes, provided every station uses the same verified plate, stud, orientation, and mounting logic. The pallet can remain the common carrier, but each CNC or CMM station still needs its own alignment and acceptance check before offsets are transferred.

05 Can I adapt an existing self-centering vise?

Often, but compatibility is not automatic. Confirm the vise base thickness, mounting-hole pattern, stud spacing, load, tool clearance, and whether an adapter plate is needed before machining the interface.

06 What maintenance has the greatest effect on repeatability?

Clean the locating faces and studs before each reseat, keep the manual release clear, and inspect the mounting fasteners and contact surfaces on a documented schedule. If results drift, clean and re-seat first, then check the plate mounting and matched stud before changing offsets.

07 Does this manual plate require compressed air?

No. The models specified on this page use manual release. If your cell needs robot loading, frequent machine-controlled release, or clamp-status feedback, review the pneumatic zero-point plate as a separate integration project.

08 What should I send to confirm configuration, lead time, and files?

Lead time is configuration-specific. Engineering confirms it in the quotation after reviewing the drawing or bill of materials, quantity, selected options, interfaces, and inspection scope. The website does not guarantee a fixed lead time.

Fast quote

Request a Zero-Point Clamping Plate Quote

Three fields are enough — our engineers reply after reviewing the request with pricing and configuration advice.