Blog

Zero-Point Clamping Plates: Why Material Hardness Matters for Wear Life

How hardness (55-58 HRC) and hardness matching with pull studs (50 HRC) prevent wear, maintain repeatability, and extend service life. Learn the 55-58 HRC standard and why it matters for your production.

Published on July 19, 20257 min read
Table of contents
Quick-Change Zero-Point Clamping Plate
Featured Product

Quick-Change Zero-Point Clamping Plate

Modular 52 mm and 96 mm zero-point base plates for vises, pallets and custom fixtures — fixed indexing, fast manual unlocking, hardened stainless construction.

  • 52 mm + 96 mm modular hole pattern
  • Hardened stainless steel for long wear life
  • Drop-in compatible with self-centering vises

When buyers compare zero-point clamping plates, they often focus on the headline benefits first: faster setup, cleaner modularity, and easier fixture transfer. Those matter. But long-term performance is usually decided by something less flashy—the way the plate handles wear after hundreds or thousands of clamping cycles.

That is where hardness becomes important. Hardness does not only affect whether a plate feels “strong.” It affects how the locating surfaces resist deformation, how well pull-down behavior stays consistent over time, and whether the system continues to return to the same reference position after repeated use in a real production environment.

55–58 HRC Hardness and Why It Holds Up

The existing Nextas Tech product story around this plate family emphasizes a hardness window of 55–58 HRC. That range is important because it balances two competing needs: strong wear resistance for repeated clamping, and enough toughness to avoid becoming too brittle in demanding machining conditions. If hardness is too low, the interface wears early. If hardness is too high without enough toughness, the part can become more vulnerable to cracking or chipping under abuse.

In a zero-point system, the interface is not a decorative surface. It is the part of the workholding chain that must stay geometrically trustworthy over time. Once the interface starts wearing unpredictably, the practical effect is not just cosmetic wear—it becomes changeover inconsistency, unexpected pull-down behavior, and more time spent proving the setup again.

Why Hardness Matching Protects Plate Precision

Durability is not only about the plate body itself. It is about how the plate, spigot, pull stud, and locating surfaces share wear. The page’s current technical explanation uses a deliberate hardness difference, with the pull stud set softer than the plate, so the easier-to-replace component takes wear first. That strategy is sound because it protects the harder, more critical interface instead of allowing damage to accumulate where recovery is more expensive.

For buyers, this matters because it changes maintenance from a major precision problem into a manageable consumable strategy. Replacing an accessory component on schedule is cheaper and less disruptive than letting a high-value base plate drift out of condition.

  • Plate hardness protects the reference interface.
  • Controlled wear on mating components makes maintenance more predictable.
  • System-level thinking preserves repeatability better than chasing hardness on one part alone.

How Durability Protects Repeatability Under Production Load

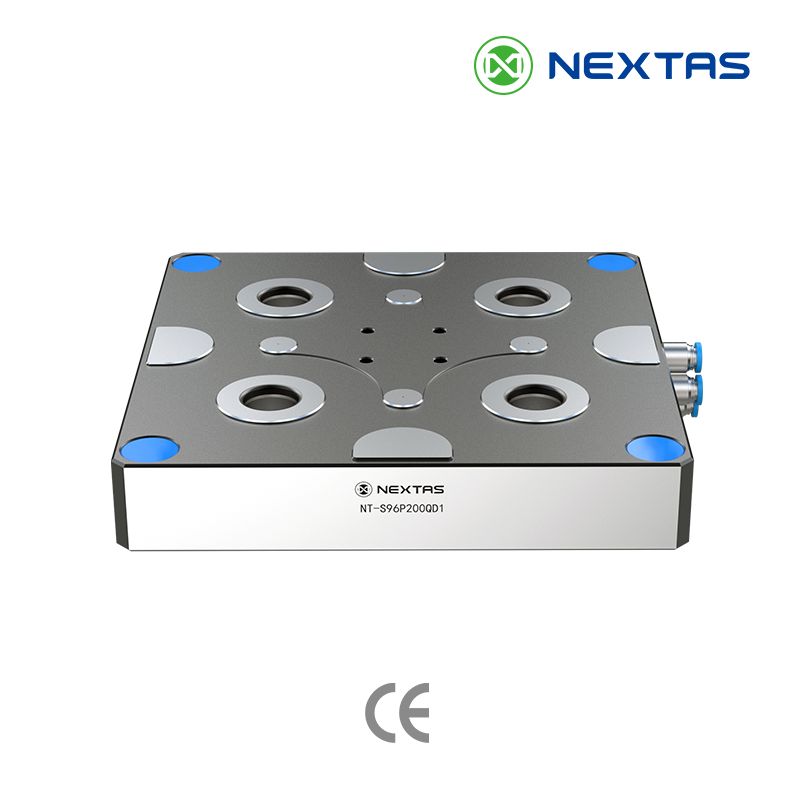
Repeatability is the real business outcome. In the current Nextas Tech catalogue, the pneumatic quick-change datum plate system is tied to repeat positioning accuracy below 0.005 mm, clamping forces above 20 kN on larger models, lifting load up to 330 kg, maximum clamping load up to 800 kg, and 52 mm / 96 mm standard hole-distance logic for modular compatibility. Those numbers matter because they show that the plate is expected to perform as a structural, repeatable interface—not merely as a convenience accessory.

From a production standpoint, durability supports repeatability in three ways:

  1. Stable locating faces reduce setup drift across repeated clamping cycles.
  2. Consistent pull-down behavior helps the vise, pallet, or fixture return in the same way each time.
  3. Better long-term geometry retention lowers the chance that minor wear turns into scrap, rework, or extra proving time.

That is especially relevant in shops with frequent fixture swaps, unattended production, or machine groups sharing the same modular workholding standard. In those environments, durability has a direct effect on labor efficiency and confidence in repeat jobs.

Maintenance Rules That Keep Hardness Benefits Real

Hardness helps, but it cannot compensate for poor daily discipline. Even a durable plate will lose performance faster if chips are trapped on the locating interface, coolant residue is allowed to build up, or worn spigots are left in service too long. Shops that want long service life should treat the zero-point interface like a precision reference surface, not like a rough mounting pad.

Interface cleanliness
Why it matters
Chips can mimic wear by lifting the locating surfaces.
Good practice
Use air cleaning and wipe critical faces every changeover.
Spigot / pull stud wear
Why it matters
Consumable parts should absorb wear before the base does.
Good practice
Inspect regularly and replace on schedule.
Clamp loading discipline
Why it matters
Improper use can damage even hardened interfaces.
Good practice
Match the plate size and load rating to the job.
Coolant and corrosion control
Why it matters
Residue and corrosion degrade contact quality.
Good practice
Clean and protect idle fixtures before storage.

How Hardness Lowers Total Cost of Ownership

For procurement teams and production managers, hardness only matters if it changes the financial picture. It does—because a more durable plate keeps precision stable longer, reduces the frequency of corrective maintenance, and lowers the risk that changeover time starts creeping back into the process. In other words, durability protects the original reason the zero-point system was purchased in the first place.

  • Longer service life means fewer plate replacements.
  • Better repeatability retention means less proving time on repeat jobs.
  • Predictable wear strategy keeps maintenance focused on lower-cost components.
  • Higher confidence in modular transfer supports multi-machine standardization and automation planning.

If your team is evaluating a new zero-point standard, ask not only about setup speed, but also about hardness strategy, mating-part wear, cleaning features, and how the system protects repeatability after long-term use. That is where lifetime value is decided.


Free Resource

Get the free workholding selection guide

Send your work email — we'll send the PDF selection guide + a 1-page workholding checklist within 1 business day. No spam, no obligation.

Reply within 1 business day · No spam · Data used for your enquiry only

Comparison, Selection & Cost Guide (Quick Tables)

Material and hardness are one input; the wider setup is another. The tables below compare the workholding options on changeover time, repeatability, automation readiness, and total cost.

Quick comparison: common workholding options

Zero-point system / zero-point clamping plate
Best for
Frequent part changes, multi-part families, modular setups
Strengths
Fast repeatable locating, scalable, automation-ready
Watch-outs
Needs clean interfaces; plan for chip control
Typical changeover
30–120 sec
Zero-Point Clamping Plate + pallet standards
Best for
High repeatability + fast swaps on fixtures/pallets
Strengths
Stable datum, scalable modularity, automation-ready
Watch-outs
Cleanliness + stud compatibility; plan chip control
Typical changeover
20–60 sec
Pneumatic vise
Best for
High mix + unattended runs where cycle time matters
Strengths
Stable clamping force, easy automation, consistent loading
Watch-outs
Air quality + pressure stability; safety interlocks
Typical changeover
1–3 min
Self-centering vise
Best for
Symmetric parts, 5-axis access, quick centering
Strengths
Centers fast, reduces setup errors, good for 5-axis
Watch-outs
Jaw travel limits; verify part envelope
Typical changeover
1–5 min
Hydraulic fixture
Best for
High-volume or high-clamp-force machining
Strengths
Strong & stable, great for tight tolerances
Watch-outs
Higher upfront cost; maintenance & leak checks
Typical changeover
5–20 min
Custom dedicated fixture / jig
Best for
One part, very stable process, repeat production
Strengths
Max stability, lowest unit cost at scale
Watch-outs
Slow to change; redesign needed for new parts
Typical changeover
10–60 min
Pallet changer
Best for
Parallel setup + spindle utilization gains
Strengths
Setup off-machine, better OEE, easier lights-out
Watch-outs
Needs process discipline + pallet standards
Typical changeover
Varies (2–10 min off-machine)
FMS / pallet pool (automation)
Best for
Many SKUs + long unattended windows
Strengths
Best throughput + scheduling flexibility
Watch-outs
Highest system complexity; needs planning
Typical changeover
N/A (system-level)

Fast selection: match your scenario

High-mix work; target repeatability ≤0.01 mm
Recommended setup
Zero-Point Clamping System + standard pallet/stud kit
Notes
Define a master datum; add chip covers; get a layout for layout help.
1–10 pcs, frequent changeovers, < 0.02 mm targets
Recommended setup
Zero-point system + modular base
Notes
Build a “standardized base” and swap top tooling.
10–200 pcs, operator present, mixed geometries
Recommended setup
Self-centering vise or pneumatic vise + soft jaws
Notes
Add quick jaw change + pre-set stops.
200+ pcs, high clamp force, stable part family
Recommended setup
Hydraulic fixture or dedicated fixture
Notes
Optimize for cycle time + tool access.
Lights-out / unmanned shift (2–8+ hours)
Recommended setup
Pneumatic vise + pallet changer or FMS
Notes
Prioritize sensing, chip evacuation, and fail-safe clamping.

What affects price (and how to control it)

Pallet/stud standardization
Why it changes price
More pallets/studs costs more upfront but saves changeover time
How to reduce cost
Phase in pallets; reuse patterns across machines.
Repeatability requirement (e.g., ≤0.01 mm)
Why it changes price
Tighter repeatability needs higher precision interfaces and QC
How to reduce cost
Standardize datums; use proven modules; avoid over-spec.
Changeover frequency
Why it changes price
More swaps reward quick-change systems (ROI grows fast)
How to reduce cost
Measure setup time; prioritize the biggest bottleneck.
Automation level (sensors, interlocks, palletization)
Why it changes price
Adds hardware + integration time
How to reduce cost
Start with one cell; reuse components across machines.
Workpiece size & material
Why it changes price
Large/heavy parts need stronger clamping + bigger bases
How to reduce cost
Use modular plates; right-size the fixture footprint.
Engineering time (custom vs modular)
Why it changes price
Custom design drives NRE cost
How to reduce cost
Prefer modular stacks; keep custom parts minimal.

Common mistakes (and quick fixes)

Ignoring interface cleanliness

Symptom: Repeatability drift, random tolerance errors

Fix: Use covers + air blast + cleaning routine.

Mixing incompatible studs/pallets

Symptom: Hard-to-debug positioning errors

Fix: Lock one standard; document torque &amp; specs.

Skipping chip control on locating surfaces

Symptom: Repeatability drifts; “mystery” setup errors

Fix: Add air blast, covers, and a cleaning routine.

Over-clamping thin parts

Symptom: Warping, chatter, tolerance issues

Fix: Use proper jaw support + controlled clamping force.

No standard datum / pallet standard

Symptom: Every setup becomes a one-off

Fix: Define a shop standard (datums, pallet, bolt pattern).

Choosing by lowest price only

Symptom: Higher labor cost + downtime

Fix: Evaluate total cost: labor, scrap, changeover time.

Want a recommendation for your parts? Send us your machine model, material, and tolerance target — we’ll suggest a practical setup.

Frequently Asked Questions

Why is the pull stud (50 HRC) softer than the clamping plate (55-58 HRC)?

This is a deliberate, scientific design choice. The slightly softer pull stud is engineered to wear first, acting as a sacrificial component. This strategic wear protects the precision of the more critical and expensive clamping plate, maintaining its longevity. Pull studs are far easier and more cost-effective to replace than the entire plate.

What does a 0.5% wear rate after 5000 cycles actually mean for my workshop?

It means you can trust the plate to maintain its micron-level accuracy for a very long time, even under heavy, repeated production use. This translates directly to consistent part quality, a significant reduction in the need for frequent recalibration, less machine downtime, and a lower scrap rate—all of which boost your productivity and lower your total cost of ownership.

Is a harder plate always better? What if it's too hard?

Not necessarily. There's a critical balance. While higher hardness provides superior wear resistance, extreme hardness can lead to brittleness. A brittle plate could be susceptible to cracking or chipping under the intense shock and vibration of heavy machining. Our 55-58 HRC range is the optimized balance, providing maximum durability and wear resistance without sacrificing the essential toughness required in a demanding manufacturing environment.

How does 55-58 HRC compare to standard, untreated steel?

The difference is massive. Standard, untreated low-alloy steel might have a hardness of only 15-20 HRC. Our 55-58 HRC range is achieved through a specialized heat treatment process on high-grade alloy steel. This places our plates in the upper echelon of hardened tooling, offering wear resistance that is exponentially greater than standard materials, maintaining a significantly longer service life.

Keep exploring

Continue with closely matched guides on zero-point selection, repeatability, plate layout and retrofit planning.

Browse all articles →

Match the hardware

These product pages are the most direct next step if you are comparing zero-point hardware, plate formats and integration options.

Browse all products →

Comparing zero-point plate options?

Share your plate size, machine interface, and changeover goals. We’ll help review standard and custom plate layouts for repeatable positioning and faster setup swaps.

Review Plate Layout Options →