Blog

Pneumatic Zero-Point Plates: How They Fit Into Automated Quick-Change Setups

For shops adding automation step by step, pneumatic zero-point plates are a quick path to fixture exchange. This guide covers pneumatic setup, signal design, and validation steps for reliable unattended production.

Published on August 12, 20257 min read
Table of contents
Pneumatic Zero-Point Plate
Featured Product

Pneumatic Zero-Point Plate

Spring-locked, pneumatically released zero-point plates for CNC pallet changes and robot loading — repeatable seating with built-in clamp signals.

  • Spring-locked / pneumatic release
  • Built-in clamp & seat signals for PLC
  • Drop-in for 52 mm / 96 mm pallets

Why pneumatic release is retrofit-friendly

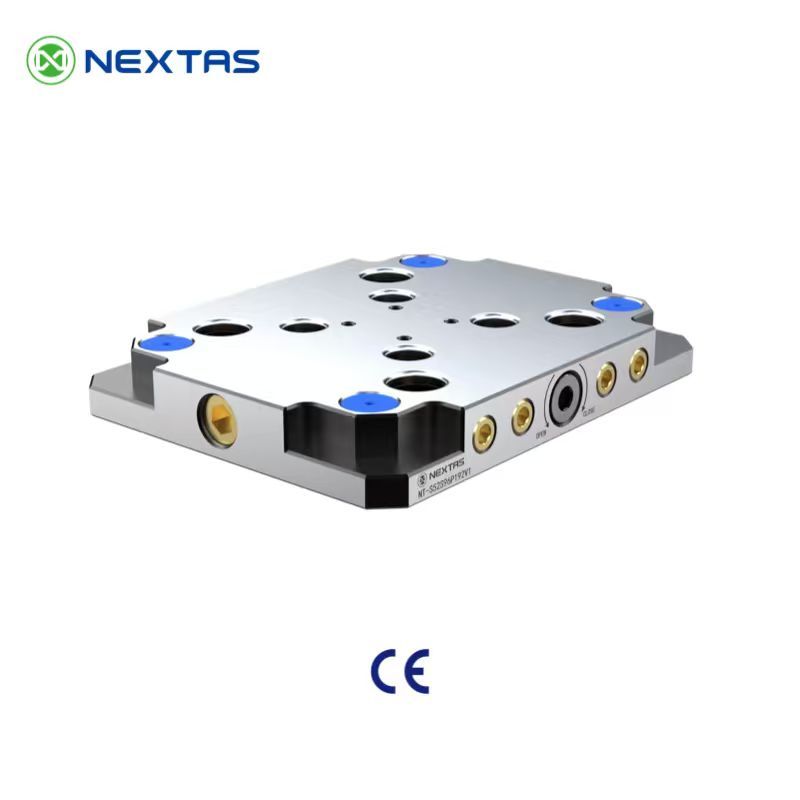
Pneumatic zero-point plates are attractive for retrofit projects because most shops already have compressed air, and air-released actuation is easy to integrate without the plumbing burden of a full hydraulic retrofit. You get fast unclamp cycles for fixture exchange while still relying on a mechanical self-locking structure to hold the pallet securely during cutting.

That makes pneumatic plates especially useful when a shop wants to automate one machine at a time. They fit the “start simple, expand later” approach better than a full greenfield cell because the change happens at the fixture interface first, not across the whole process at once.

Design air prep, sensors and clamp confirmation first

Before talking about cycle time, decide how the plate will be supplied and verified. Clean, dry air, stable pressure, and sensible hose routing matter because a fast actuator is useless if pressure drops, seals suffer, or response becomes inconsistent across shifts.

Just as important are the confirmation signals. At minimum, the control logic should know whether the plate is clamped or unclamped; in many cells it is also worth adding part-present or pallet-present feedback. These signals are what let the CNC, PLC, or robot decide whether it is safe to continue, retry, or stop.

Validate repeatability over repeated clamp/unclamp cycles

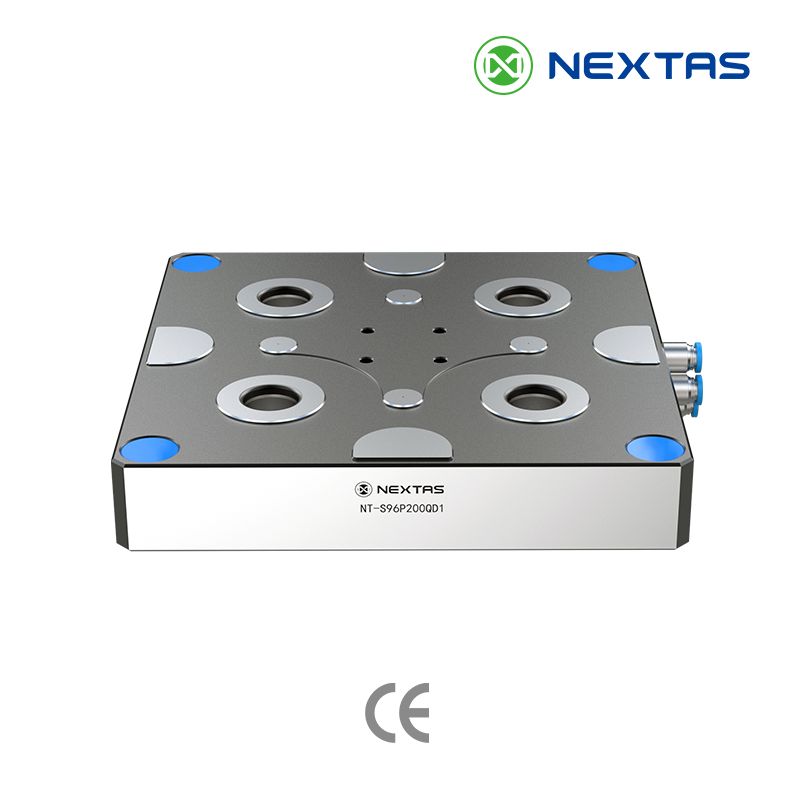
A pneumatic plate is only automation-ready if it returns to datum reliably after repeated clamp/unclamp cycles. Run a practical validation before production: cycle the plate multiple times, probe or indicate a known feature, and record the spread instead of trusting the catalog alone.

This is also where chip protection matters. Air-blast cleaning, protected locating faces, and a simple pre-clamp wipe routine often make the difference between a stable ≤ 0.005 mm-class result and a setup that drifts unpredictably once coolant and chips build up.

Write recovery logic before lights-out production

Many retrofit projects fail not because the plate cannot clamp, but because the recovery sequence was never thought through. Decide in advance what happens if clamp-ok is missing, if a pallet is only partially seated, or if air pressure drops during a cycle.

A strong recovery routine usually includes a safe stop state, a retry limit, an operator call path, and a manual recovery procedure that does not lose the process datum. That logic is part of the workholding project — not a separate automation detail.

Best-fit use cases for pneumatic zero-point plates

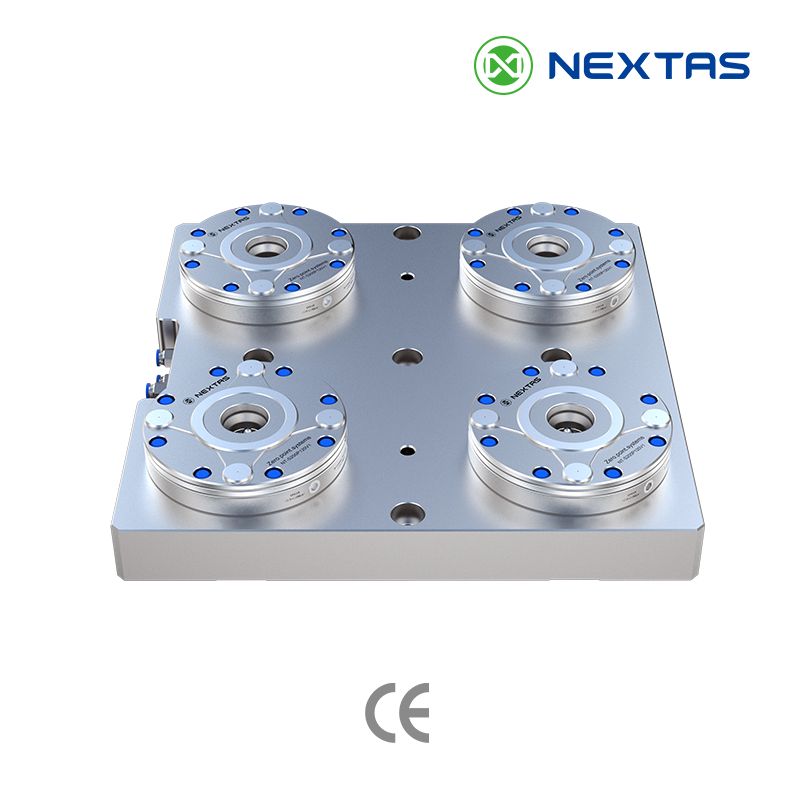
Pneumatic plates make the most sense in robot-tended cells, palletized high-mix CNC work, and retrofit projects where faster fixture exchange is the first automation bottleneck to solve.

They are especially strong when you need quicker changeovers, confirmation signals, and a consistent interface across multiple fixtures — but do not want to overbuild the first stage of automation. For purely manual, low-changeover work, a simpler mechanical setup may still be enough.

  • Retrofit one machine first, then extend the same interface to additional machines or pallets.
  • Use clamp-ok and pallet-present signals so the control system can make safe decisions automatically.
  • Validate air quality, seating cleanliness, and re-clamp repeatability before running unattended shifts.

Retrofit readiness checklist

Before ordering hardware, map the full fixture path from storage to the machine table and back again. A retrofit succeeds when air routing, cable protection, robot reach, cleaning access, pallet identification, and manual recovery are all thought through together. The plate itself is only one layer of the system.

  • Check whether your current machine table, tombstone, or pallet can accept the added stack height without harming tool reach.
  • Reserve clean routing for air lines and sensor leads so maintenance does not become a daily fight.
  • Set a cleaning routine for locating faces before every clamp event, especially in wet machining or cast-iron environments.
  • Decide who owns reset and recovery after a failed seat: the CNC, the robot, or an operator with a standard procedure.

How to validate a pneumatic plate before release to production

A good commissioning routine uses repeated clamp/unclamp cycles, indicator checks at critical datums, a dirty-environment simulation, and at least one planned fault case. That test should prove more than raw repeatability; it should prove the cell can recognize an abnormal state and recover without losing control of the process. Once that logic is documented, scaling the same interface to more machines becomes much safer.


Free Resource

Get the free workholding selection guide

Send your work email — we'll send the PDF selection guide + a 1-page workholding checklist within 1 business day. No spam, no obligation.

Reply within 1 business day · No spam · Data used for your enquiry only

Comparison, Selection & Cost Guide (Quick Tables)

Quick-change setups live or die on the locating interface, so the tables below compare the options on changeover time, repeatability, automation readiness, and cost.

Quick comparison: common workholding options

Zero-point system / zero-point clamping plate
Best for
Frequent part changes, multi-part families, modular setups
Strengths
Fast repeatable locating, scalable, automation-ready
Watch-outs
Needs clean interfaces; plan for chip control
Typical changeover
30–120 sec
Pneumatic Zero-Point Plate (quick-swap base)
Best for
Fast pallet swaps + automation-ready loading
Strengths
Quick changeovers, repeatable locating, easy integration
Watch-outs
Keep interfaces clean; confirm air routing + safety
Typical changeover
20–60 sec
Pneumatic vise
Best for
High mix + unattended runs where cycle time matters
Strengths
Stable clamping force, easy automation, consistent loading
Watch-outs
Air quality + pressure stability; safety interlocks
Typical changeover
1–3 min
Self-centering vise
Best for
Symmetric parts, 5-axis access, quick centering
Strengths
Centers fast, reduces setup errors, good for 5-axis
Watch-outs
Jaw travel limits; verify part envelope
Typical changeover
1–5 min
Hydraulic fixture
Best for
High-volume or high-clamp-force machining
Strengths
Strong & stable, great for tight tolerances
Watch-outs
Higher upfront cost; maintenance & leak checks
Typical changeover
5–20 min
Custom dedicated fixture / jig
Best for
One part, very stable process, repeat production
Strengths
Max stability, lowest unit cost at scale
Watch-outs
Slow to change; redesign needed for new parts
Typical changeover
10–60 min
Pallet changer
Best for
Parallel setup + spindle utilization gains
Strengths
Setup off-machine, better OEE, easier lights-out
Watch-outs
Needs process discipline + pallet standards
Typical changeover
Varies (2–10 min off-machine)
FMS / pallet pool (automation)
Best for
Many SKUs + long unattended windows
Strengths
Best throughput + scheduling flexibility
Watch-outs
Highest system complexity; needs planning
Typical changeover
N/A (system-level)

Fast selection: match your scenario

Want quick pallet swaps for lights-out automation
Recommended setup
Pneumatic Zero-Point Plate + standardized pallets
Notes
Define one stud/pallet pattern; add chip covers + air blast.
1–10 pcs, frequent changeovers, < 0.02 mm targets
Recommended setup
Zero-point system + modular base
Notes
Build a “standardized base” and swap top tooling.
10–200 pcs, operator present, mixed geometries
Recommended setup
Self-centering vise or pneumatic vise + soft jaws
Notes
Add quick jaw change + pre-set stops.
200+ pcs, high clamp force, stable part family
Recommended setup
Hydraulic fixture or dedicated fixture
Notes
Optimize for cycle time + tool access.
Lights-out / unmanned shift (2–8+ hours)
Recommended setup
Pneumatic vise + pallet changer or FMS
Notes
Prioritize sensing, chip evacuation, and fail-safe clamping.

What affects price (and how to control it)

Pallet inventory + stud kits
Why it changes price
More pallets/studs increases hardware cost but cuts downtime
How to reduce cost
Start with 2–4 pallets; expand as OEE improves.
Repeatability requirement (e.g., ≤0.01 mm)
Why it changes price
Tighter repeatability needs higher precision interfaces and QC
How to reduce cost
Standardize datums; use proven modules; avoid over-spec.
Changeover frequency
Why it changes price
More swaps reward quick-change systems (ROI grows fast)
How to reduce cost
Measure setup time; prioritize the biggest bottleneck.
Automation level (sensors, interlocks, palletization)
Why it changes price
Adds hardware + integration time
How to reduce cost
Start with one cell; reuse components across machines.
Workpiece size & material
Why it changes price
Large/heavy parts need stronger clamping + bigger bases
How to reduce cost
Use modular plates; right-size the fixture footprint.
Engineering time (custom vs modular)
Why it changes price
Custom design drives NRE cost
How to reduce cost
Prefer modular stacks; keep custom parts minimal.

Common mistakes (and quick fixes)

Mixing stud standards

Symptom: Poor repeatability, unexpected mis-locating

Fix: Standardize one pattern; label pallets clearly.

Skipping cleaning routine

Symptom: Drift, “mystery” tolerance issues

Fix: Use covers + air blast + quick wipe checklist.

Skipping chip control on locating surfaces

Symptom: Repeatability drifts; “mystery” setup errors

Fix: Add air blast, covers, and a cleaning routine.

Over-clamping thin parts

Symptom: Warping, chatter, tolerance issues

Fix: Use proper jaw support + controlled clamping force.

No standard datum / pallet standard

Symptom: Every setup becomes a one-off

Fix: Define a shop standard (datums, pallet, bolt pattern).

Choosing by lowest price only

Symptom: Higher labor cost + downtime

Fix: Evaluate total cost: labor, scrap, changeover time.

Want a recommendation for your parts? Send us your machine model, material, and tolerance target — we’ll suggest a practical setup.

Frequently Asked Questions

What utilities do I need to retrofit a pneumatic zero-point plate?

Most retrofit projects need clean, dry compressed air with stable pressure, sensible hose routing, and the I/O needed to confirm clamp status. Some cells also add pallet-present or part-present sensing. The exact package is simple compared with many hydraulic retrofits, but utility quality still matters.

Do I really need sensors if the plate already clamps pneumatically?

For attended manual use, maybe not. For automation, yes — sensors or equivalent status confirmation are highly recommended. Without clamp feedback, the CNC or robot has no reliable way to know whether the pallet is actually seated and safe to machine.

How do I prove the system is stable before unattended shifts?

Run repeated clamp/unclamp cycles with a known datum, then probe or indicate the same feature each time and record the variation. Do that under realistic chip-and-coolant conditions, not just on a clean bench, so you know the cell is stable in production.

What should the recovery sequence do when clamp-ok is missing?

It should stop motion safely, attempt a controlled retry if that is part of the logic, and escalate to an operator if confirmation still fails. The recovery plan should preserve the datum, prevent machining on an unconfirmed pallet, and make troubleshooting straightforward on the shop floor.

Keep exploring

Continue with closely matched guides on zero-point selection, repeatability, plate layout and retrofit planning.

Browse all articles →

Match the hardware

These product pages are the most direct next step if you are comparing zero-point hardware, plate formats and integration options.

Browse all products →

Planning a zero-point automation setup?

Share your pallet size, machine interface, and clamp-state requirements. We’ll help review whether a pneumatic zero-point plate fits your changeover targets and unattended machining plan.

Discuss Automation Integration →