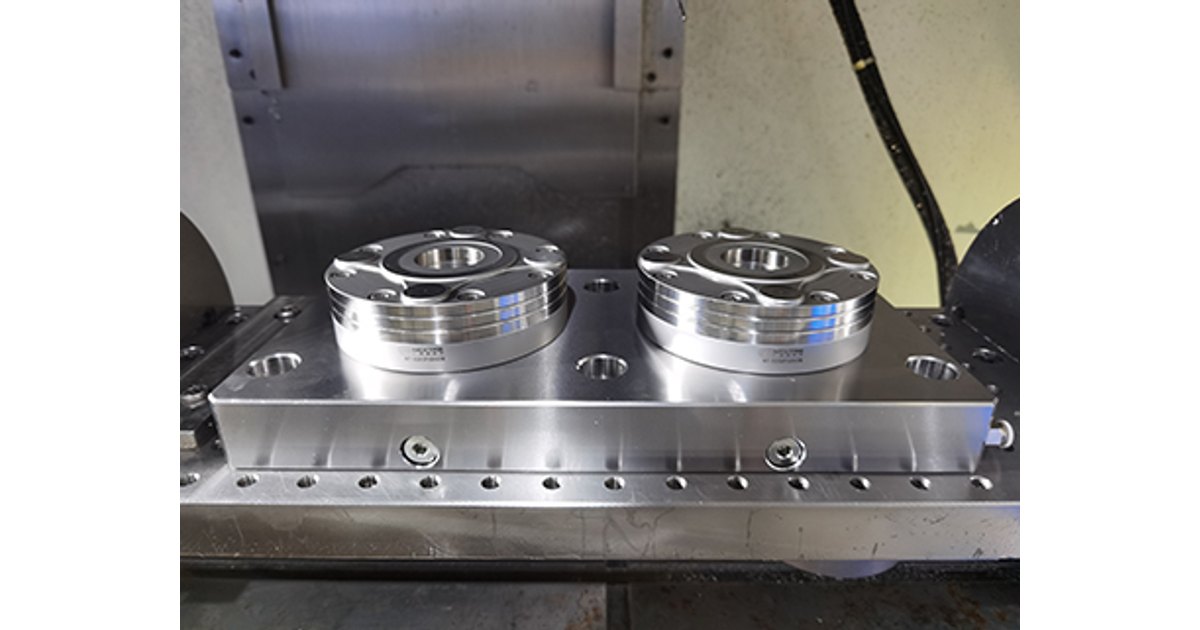
The pallet will not drop. Or it drops and the spindle still will not start. On a zero-point cell, that often means one module will not lock, will not open, or will not prove that the pallet is seated.
A zero-point module is the round lock on the machine table. Pins on the underside of the pallet pull into it. That lock is the datum the fixture comes back to after every change.
You do not need a second full pallet of iron on the shelf. You do need the parts that wear first: pins, seals, grease, covers, and the screws the drawing names. You also need a way to name the module before purchasing writes the order.
Short version:
Keep pins, seals, grease, covers, and the named high-tensile screws in the crib. Treat sensors and special pins as week-scale orders. Do not open the spring pack on a bench. Keep one complete spare module for a busy cell. Name the module from the laser mark, the slides in the bore, and the air ports on the back before anyone orders a kit.
What belongs in the crib
The module body is not the first thing that wears. The parts that take chips, coolant, and clamp load are. Stock those. Leave the spring pack and the matched slides to a factory rebuild.
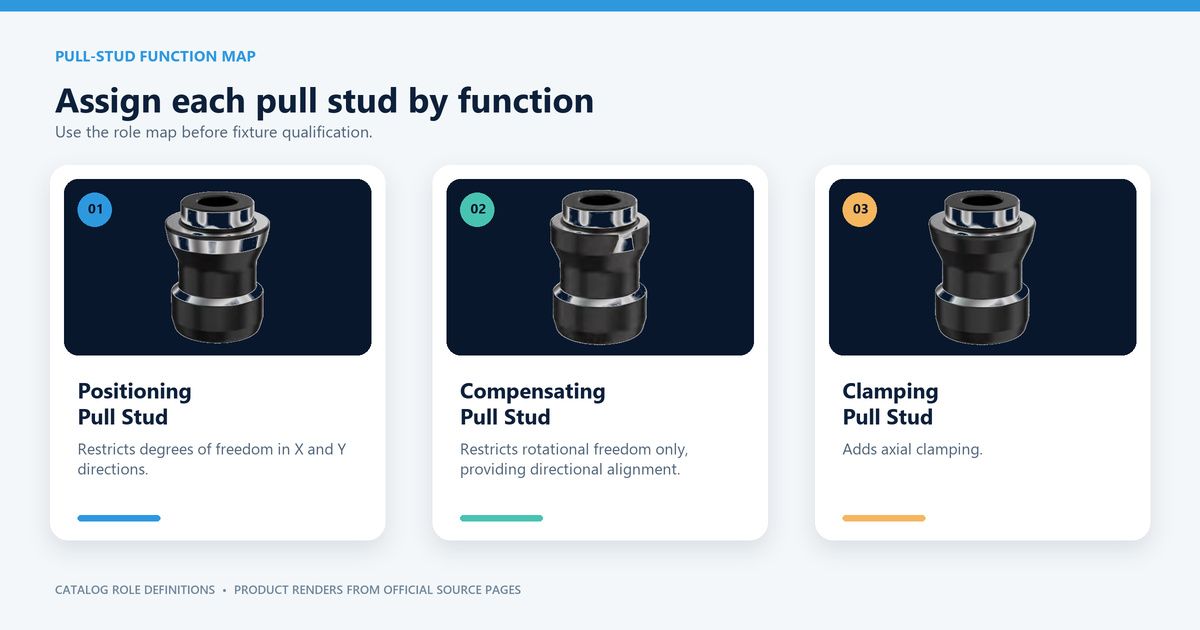
Start with the pins. They are the mechanical link between the pallet and the module. A multi-point pallet usually uses three jobs, not three identical pins:
- Positioning pin: locates the pallet in both table directions. Some OEM catalogues call this Type A.
- Compensating pin: locates along one axis so heat can move the pallet without fighting the first pin. Some catalogues call this Type B.
- Clamping pin: pulls down only. It does not set X or Y. Some catalogues call this Type C.
NEXTAS describes the same split as positioning, compensating, and clamping on the zero-point module page. The names change by brand. The jobs do not. Order the mix that is actually under your pallets, not a bag of one style.
If you already run an installed pin library, keep that geometry. The pull-stud migration guide is the companion when the question is a second source, not a crib refill. Do not treat a near match as a spare.
Next are seals and covers. Coolant and grit that get inside a module rust slides and wash grease. Stock the port O-rings and the cheap cover plugs that keep chips out of unused bores. A module that looks sealed still uses those parts. Replace the set the drawing names. Do not guess a size from a similar unit on the next machine.
Grease is not generic workshop grease. Water-mix coolant washes ordinary EP grease out of slides. Keep the paste the OEM names for that module, or the paste listed on the NEXTAS drawing for a NEXTAS module. Use a dedicated needle gun so shop dirt does not go into the nipple.
Screws last. Pin screws and module bolts are high-tensile parts. The drawing will name a class, often 12.9 or 10.9, and a thread. Hardware-store screws are not a spare. After a crash or a stall, throw the loaded screws away. Do not put them back.
Days, weeks, or a factory rebuild
The expensive mistake is to wait until the cell is down, then order the inside of the module. Spring packs, matched slides, and housings often leave the shop. That is a rebuild, not a crib job.
Use the bands below as a planning example, not as a NEXTAS lead time. Confirm the date with the vendor who will actually ship the line.
Planning bands only. Your distributor, OEM, or factory quote sets the real date.
| Band | Typical wait if it is in the channel | What belongs here | What to keep on hand |
|---|---|---|---|
| Crib parts | Often a few days from a stocked distributor | Grease, port O-rings, cover plugs, standard pins, named class 12.9 or 10.9 screws | A rolling few months of what that cell actually uses |
| Field kits | Often two to four weeks if the item is not on the shelf | Special pins, proximity switches, air nipples, seating-check fittings | One spare kit per automated machine that needs that option |
| Factory rebuild | Often six to twelve weeks, sometimes longer | Spring packs, matched slides, pistons, ground housings | One complete spare module, not a bag of internal parts |
Those week counts are a planning example. A stocked pin can arrive tomorrow. The same pin in a special grind can sit in a queue. Write the quoted date on the bin card. Do not copy a band from this page onto a purchase order.
Do not open the spring cover on a bench.
The slides stay closed because the spring pack is pre-loaded. If you take the cover screws out without the OEM holding fixture, parts can fly. That can injure the person at the bench. Send the module back. Swap a complete spare onto the plate and keep the cell cutting.
How many spare modules? One complete, ready-to-mount module for every eight to twelve live modules is a planning example, not a rule. A one-station 5-axis cell may need that spare more than a plate with four modules, because one failure stops the only station. Count the stations that cannot wait, not the number of round bodies on the floor.

This is not the same problem as a blanket order for new vises or plates. That buying path is in the MOQ and call-off guide. Here the goal is to keep one running cell from waiting on a factory rebuild.
Name the module before you order
A dirty module with no paperwork is a common spare-parts order. Guessing the family from a photo of a round body is how shops buy the wrong O-ring set.
Walk the unit in this order. Stop when you have a code you can put on the purchase line.
- Clean the housing and read the mark. Most industrial modules carry a laser ID on the outer wall or the bottom face. SCHUNK often uses a long article number. SMW-AUTOBLOK often uses an order code. AMF often stamps a series code on the sleeve flange. NEXTAS modules use the model code on the drawing, such as the listed V1 receivers NT-S200P85V1, NT-S200P120V1, NT-S200P160V1, and NT-S200P195V1. Photograph the mark before you wipe it again.
- Look down the centre bore. Two slides facing each other is a two-slide layout. Three slides spaced around the bore is a three-slide layout. A circular cage of balls moving inward is a ball-lock layout. Those three are not spare-parts interchangeable. If the mark is gone, this step still tells purchasing which family to ask about.
- Count the air ports on the back or the side. A basic module may have only an open line, often around 6 bar, to compress the springs and release the pins. Extra ports are not decoration. A turbo port adds pull-down during clamp. A sense port checks that the pallet is seated. A stroke port tells the controller whether the slides are open or locked. A blow port clears chips from the centre. Write the letters you can see, then match them to the drawing. Do not invent a missing letter.
- Record the pin mix on the pallet. Count positioning, compensating, and clamping pins. Measure the thread and the shoulder if the drawing is missing. A spare pin of the wrong job will clamp and still let the pallet walk.
NEXTAS is an independent supplier. It is not affiliated with, authorized by, or endorsed by SCHUNK, SMW-AUTOBLOK, AMF, EROWA, or ZeroClamp. Those names appear here so you can identify equipment already on the floor. A similar outside diameter is not a drop-in. Confirm the exact module, pin, thread, and air map before you buy a spare, then prove it on the machine before production.
If you are choosing a second source rather than restocking the crib, use the VERO-S alternative guide or the supplier checklist. Those pages start with the interface. This page starts with the bin.
Three habits that stop bad orders
Spare parts will not save a cell that loosens screws, feeds wet air, or runs a tired spring pack until the cutter chatters.
Torque the screws the drawing names. A loose pin screw walks under cut and scrapes the taper. An over-tight screw stretches and can snap later. Use a calibrated wrench. Aim for at least one and a half times the screw diameter of clean thread in the plate or fixture.
Give the module the air the drawing asks for. Wet or dirty air scores seals, pits pistons, and washes the paste you just put in. Fit a filter and a water separator at the cell. The listed NEXTAS unlock supply is a 6 bar class; the selected model drawing still rules. The air flow and FRL guide covers the line, not a crib list.

Check pull-down before the spring is finished. If you have a digital force tester, measure each station on a set interval and compare it with the rated figure on that module’s drawing. NEXTAS does not publish a universal “replace at 15 percent” rule here. If you do not have a tester, watch the shop signs: extra pressure to unlock, seating marks that grow, or chatter that started after the fixture and the tool stayed the same. Schedule the rebuild while you still have a spare module to swap in.
A clamp or seat signal is a process check. It is not a safety-rated function unless the cell safety design says so and someone has tested that function. Guarding, stop logic, and restart still belong to the cell builder. The clamp I/O checklist covers that boundary for robot-loaded stations.
What to send for a spare-parts review
NEXTAS can review a NEXTAS module, pin mix, and crib list against what you send. It cannot approve an OEM rebuild from a photo, and it cannot promise that a NEXTAS pin will replace another brand’s pin until the interface is checked.
- The module: photos of the laser mark, the bore, the back ports, and the mounted height on the plate.
- The pins: photos of each role on the pallet, plus thread, shoulder, and any drawing you have.
- The cell: machine model, how many live modules, whether a robot or pallet pool waits on that station, and whether the module has sensing or turbo air.
- The failure: will not lock, will not open, leaks, slow stroke, or dirty seating. Say which. Say if you are unsure.
- What you already stock: pin types and counts, seal kits, grease, and whether a complete spare module exists.
Write unknown on any line you cannot answer. A blank is easier to quote than a guessed ID number.
NEXTAS is an independent supplier and is not affiliated with, endorsed by, or sponsored by SCHUNK, SMW-AUTOBLOK, ANDREAS MAIER GmbH & Co. KG (AMF), EROWA, or ZeroClamp. Brand names and catalogue codes appear only to identify installed equipment a buyer may already have.
Questions buyers ask before they stock a crib
Do I need a full spare pallet of hardware?
No. Stock the parts that wear: pins in each job, seals, grease, covers, and the screws the drawing names. Keep a complete spare module for a station that cannot wait on a factory rebuild. Do not store a second full pallet “just in case.”
Can I change the springs on a bench?
No. The spring pack is pre-loaded. Taking the cover off without the OEM holding fixture can throw parts. Swap a complete module and send the worn unit to a factory rebuild.
How do I know which pin to stock?
Count the jobs on the pallet: positioning, compensating, and clamping. Some catalogues label those Type A, B, and C. Order that mix, with the thread and shoulder from the drawing or from a measured pin. One style of pin is not a spare for the other two.
Will a NEXTAS module replace a SCHUNK or AMF module from the crib?
Not from a photo and not from a family name. NEXTAS is not affiliated with those brands. Confirm the exact module, pin, air map, and mounting pattern, then prove the swap on the machine before production.
What should I send to get a spare-parts list?
Send photos of the module mark, the bore, the air ports, and the pins on the pallet. Add the machine, how many live modules you run, and whether the station has sensing. Write unknown where you do not have a code yet.
Before you order a kit from a photo
Send the module mark, the pin mix, and how many stations cannot wait
NEXTAS can check a NEXTAS module and pin list against those photos and tell you which crib lines are still open. OEM rebuild dates and drop-in claims stay with the vendor who owns that interface.
Discuss your zero-point crib